Guide A-114
Revised by Robert Flynn
College of Agricultural, Consumer and Environmental Sciences
Author: Extension Agronomist, Department of Extension Plant Sciences, New Mexico State University. (Print Friendly PDF)
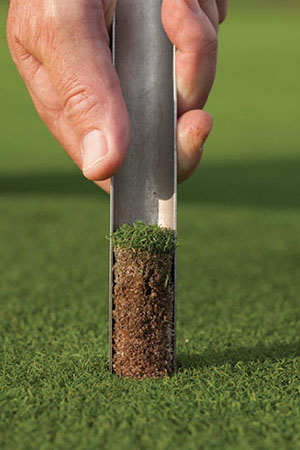
© Marcus Holman | Dreamstime.com
Introduction
Soil tests provide a scientific basis for regulating available plant nutrients. Recommendations on the kinds and amounts of fertilizer to apply and soil management practices are based on test results. Tests on a sample that does not accurately represent your garden or field’s soil are likely to be misleading. The following directions can help you take a representative sample.
Background Information About Your Soil
The USDA Natural Resources Conservation Service maintains an online, interactive Web Soil Survey (WSS) application that lets you explore soil properties recorded in earlier soil surveys (http://websoilsurvey.nrcs.usda.gov/app/).
Once launched, the WSS will show a map of the U.S. with a quick navigation bar that allows you to select an “area of interest” using your address, state and county, soil survey area, latitude and longitude, or other means. Once you specify the area of interest, you can investigate the many soil properties of that area. The WSS does not take the place of getting a soil sample and analysis because soils are dynamic and change in chemical and some physical characteristics based on how they have been managed. The soil boundaries on the WSS maps are also not exact.
Sampling Supplies
You will need a soil auger, a soil tube, or a shovel and knife to take the soil samples. All equipment should be free of rust—especially if the soil analysis will test for plant-available iron.
Next, you will need a clean bucket or other suitable container for mixing soil subsamples. Do not use a container made of metal. Plastic dishwashing bins or kitty litter pans are perfect sizes for handling soil samples.
Next, you will need sealable plastic bags to hold the required amount of soil for analysis (about two cups). You will also need an information form for each sample; most labs will have a website with forms you can download, print out, and fill in.
Finally, you will need a box or other suitable container for mailing or transporting the soil samples to the laboratory.
Where to Sample—Obtaining a Representative Sample
The sample you send to the lab needs to represent the soils, slopes, and management of your garden or field. To be representative, a composite sample is the best way to determine the average soil condition.
For small areas like a garden, it is best to take samples from five or six areas; for larger areas like fields, take up to 15 samples. The samples will then be combined into one sample to send to the lab.
To take a composite sample, randomly select several locations in the area of interest (as illustrated in Figure 1), then mix them in the same container. Avoid areas near walkways, fence rows, compost piles, fertilizer bands, or other non-typical areas. Raised beds should probably be sampled individually depending on soil, soil amendments, and planting history.

Figure 1. To take a composite sample, take samples from several randomly selected locations in the area of interest. For gardens, sample five or six locations; for fields, sample up to 15 locations.
At each site, remove any surface litter such as straw, leaves, or old stalks. Each sample should be taken to the same depth. Annually tilled gardens should be sampled to the tillage depth. Gardens growing perennial plants should be sampled to a depth of 6 inches. Soil from deeper depths can be used to evaluate soil nitrate that would affect fertilizer nitrogen (N) recommendations.
If there are large trouble spots or areas that differ extremely in appearance, slope, soil structure, productivity, drainage, cropping pattern, or soil treatment, then a separate composite sample from each of these areas is recommended.
Once all the subsamples have been combined in your container, the soil needs to be thoroughly mixed to break apart large chunks of soil. Then allow the sample to dry in a shaded area. Also, remove any rocks, roots, or organic matter that does not really belong (wood chips, straw, etc.).
Once the sample is dry, mix it again and put two cups of soil in the sample bag to represent your soil of interest. Do not use heat for drying. Sealable plastic bags can be used after the soil has dried unless otherwise directed by the lab. Attach the sample information sheet to the sample bag; label each sample with your name and a number keyed to a map of the sample locations so you will know where the sample was taken. If you are sending multiple samples, make sure each sample has its own information sheet. Place all samples in a box for delivery to a soil testing laboratory. NMSU Extension Guide A-146, Appropriate Analyses for New Mexico Soils (https://pubs.nmsu.edu/_a/A146/), contains a list of labs and what analyses to ask for.
The more information you can supply about the soil, the better the recommendations will be. Specify the plants that are to be grown. Fertilizer recommendations cannot be made if you do not specify the crop to be grown.
Mailing the Sample
Mail or deliver the soil sample(s) and the information sheet(s) to the lab of your choice (see Guide A-146). You can share the lab results with your local county Extension agent or agronomy specialist if the lab does not provide sufficient information on how to interpret the test results. NMSU Extension Circular 676, Interpreting Soil Tests: Unlock the Secrets of Your Soil (https://pubs.nmsu.edu/_circulars/CR676/), can also help you interpret what the numbers mean.
Video Resources
Please visit http://westernsoil.nmsu.edu for video demonstrations on how to collect and prepare samples for shipping to a soil-testing laboratory. Video topics include “Getting Started,” “Probe Versus Shovel,” “Random Sampling a Small Field with Hammer Probe,” “Random Sampling Across a Large Field with Hammer Probe,” and a short demonstration on how to handle soil variability with depth.
Note on Dying Plants
Grasses, vegetables, flowers, and other crops seldom die from lack of fertility. Water management, disease, and insects are some factors that can cause damage or death to plants. If you experience dying plants, check with your county Extension agent (http://aces.nmsu.edu/county/) because soil analysis is of little value in diagnosing these problems.
Note on Home Soil Test Kits
Many home and garden centers sell kits that can test soil for pH, nitrate-nitrogen, phosphorous, and potassium. Phosphorus results will be too high with these kits since the test uses the wrong chemicals to assess phosphorus availability in high-pH soils. Soil pH and nitrate-nitrogen results may have too wide of a range to be useful.
Note on the Presence of Soil Lime
Many New Mexico soils naturally have a native calcium carbonate content. A simple test for its presence is to pour a small amount of vinegar (or other weak acid) on the soil or on samples from different depths. If the soil effervesces (bubbles), it most likely contains enough soil lime to keep the soil pH above 7.5. Soil laboratories can determine the actual percentage as an additional test.
Note on what to ask for from a soil-testing lab
Please utilize Guide A-146, Appropriate Analyses for New Mexico Soils (https://pubs.nmsu.edu/_a/A146/), for determining what to request for analysis.
For further reading
A-148: Understanding Soil Health for Production Agriculture in New Mexico
https://pubs.nmsu.edu/_a/A148/
CR-676: Interpreting Soil Tests: Unlock the Secrets of Your Soil
https://pubs.nmsu.edu/_circulars/CR676/
Original authors: C.R. Glover, Extension Agronomist; and R.D. Baker, Extension Agronomist.

Robert Flynn is an Associate Professor of Agronomy and Soils and an Extension Agronomist at New Mexico State University. He earned his Ph.D. at Auburn University. His research and Extension efforts aim to improve grower options that lead to sustainable production through improved soil quality, water use efficiency, and crop performance.
To find more resources for your business, home, or family, visit the College of Agricultural, Consumer and Environmental Sciences on the World Wide Web at pubs.nmsu.edu
Contents of publications may be freely reproduced for educational purposes. All other rights reserved. For permission to use publications for other purposes, contact pubs@nmsu.edu or the authors listed on the publication.
New Mexico State University is an equal opportunity/affirmative action employer and educator. NMSU and the U.S. Department of Agriculture cooperating.
Revised October 2017 Las Cruces, NM