Guide G-521
Reviewed by Thomas Dominguez
College of Agricultural, Consumer and Environmental Sciences, New Mexico State University
Author: Extension agricultural agent, Quay County Extension Office, New Mexico State University. (Print Friendly PDF)
Making adobe bricks is an art. As with any art, experience is a great aid to accomplishment. The essential steps that beginners should take in learning the art of adobe construction are presented here.
Soils
Adobe bricks are made of native soil, sometimes with the addition of an organic additive. To make durable bricks, you must know which soil types to use.
In New Mexico, soils commonly called adobe soils are not well suited to brickmaking. The proportions of sand, clay, and silt in these soils may vary widely. They generally contain far too much clay and tend to shrink and crack severely as they dry. If sand is in excess, the bricks will erode easily in wet weather. Desirable soils for brickmaking are those classified as loamy sands, sandy loams, or sandy clay loams. These textural names are given to soils that contain sand, clay, and silt within the ranges of percentages shown in Table 1.
Table 1. Composition of Soils that Make Good Adobe Brick
|
Soil Textural Name |
Percent Sand |
Percent Clay |
Percent Silt |
|
Loamy sand |
70 to 85 |
0 to 15 |
0 to 30 |
|
Sandy loam |
50 to 70 |
15 to 20 |
0 to 30 |
|
Sandy clay loam |
50 to 70 |
20 to 30 |
0 to 30 |
There are three important points to remember about these soil descriptions: 1) In none of the classifications does the clay content of the soil exceed 30 percent, or roughly one-third of the ingredients, and the major portion of each class (never less than 50 percent) is sand. 2) If you cannot classify the soil yourself, seek guidance from someone with soil classification experience (county Extension agents, Soil Conservation Service personnel, or U.S. Geological Survey personnel) or get advice from someone who has had local experience at brickmaking. 3) If you cannot classify the soil or get it classified, make a trial batch of bricks from your soil at least six months before you begin production for your building project. Proportions can also be checked by filling a jar full of the soil, adding water to the top of the jar, shaking for 2 to 3 minutes, and letting settle for an hour. Sand and silt will settle rather quickly, while clay particles will settle rather slowly. This can provide your own trial-and-error education about choosing soils.
Equipment Needed
For small projects you only need:
- A good rake (for smoothing the drying area)
- A strong hoe (for mixing)
- A mold or form (Figure 1)
- A small hatchet
- A wheelbarrow
- A shovel
- A handy water supply
- A pitchfork if you add straw
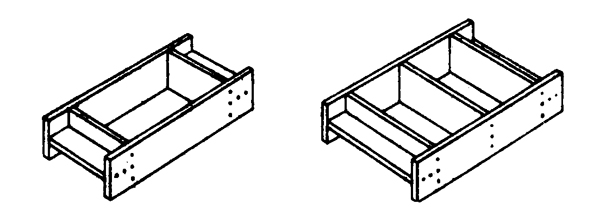
Figure 1. Common forms for molding adobe brick.
Procedures
Select a site that is near a suitable soil and has a large level area for drying and curing the bricks (Figure 2). Dig a pit about 2 feet deep and of any convenient size for mixing. Before you start mixing, soak the pit thoroughly for at least 12 hours to saturate the retaining perimeter. Mixing can also take place in a wheelbarrow, or you can line your pit with tarps.
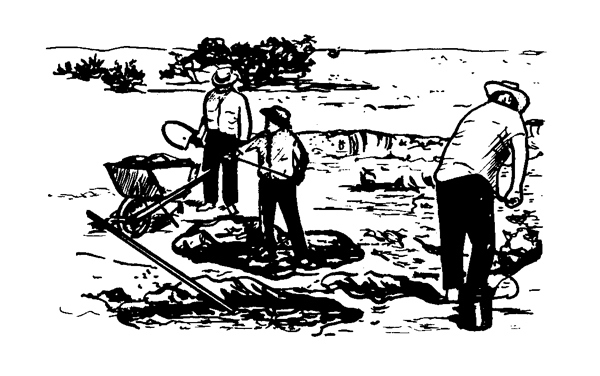
Figure 2. A suitable work site.
When you are ready to start, put some soil in your pit and add just enough water, mixing as you add, to make a stiff mix. You may wish to add straw or dried manure to your mix. Although this may be the local custom, it is not structurally necessary. Straw provides a place for insects and moisture and may rot away with time, so sand is preferred.
Transport the mix to the drying area. The drying area should be sprinkled with sand to prevent the wet blocks from binding to the surface of the drying area. Wet the forms thoroughly before filling. Fill the forms with the mix (Figure 3) and compact the corners thoroughly. With a straight edge, strike off the form and gently remove it (Figure 4), leaving the wet adobe bricks to dry for several days (at least three) before handling. Wash and reuse the forms immediately, but do not disturb the bricks. After several days, the bricks should be strong enough to be turned on their sides so that drying can continue. They will not be strong enough to be handled roughly for three or four weeks, depending on weather conditions during the drying time. However, if showers are prevalent during the brick-making season, you should stack the partially cured adobes in loose ricks (Figure 5) and protect them as much as possible from moisture.
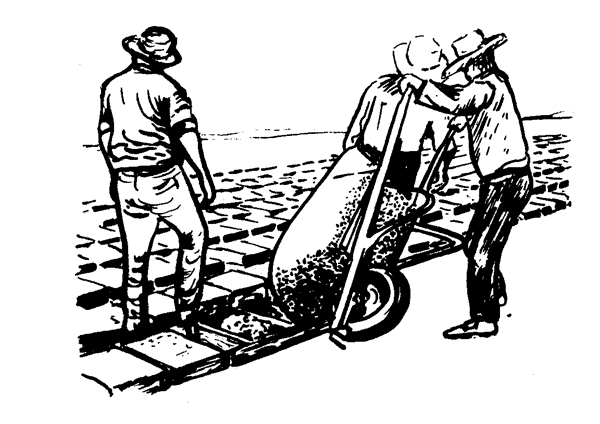
Figure 3. Filling the forms with mixture of soil and water.
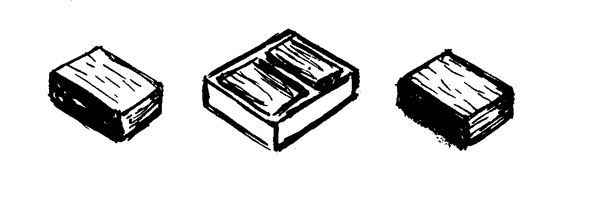
Figure 4. Loose adobe bricks (left and right) and adobe bricks in form (center).
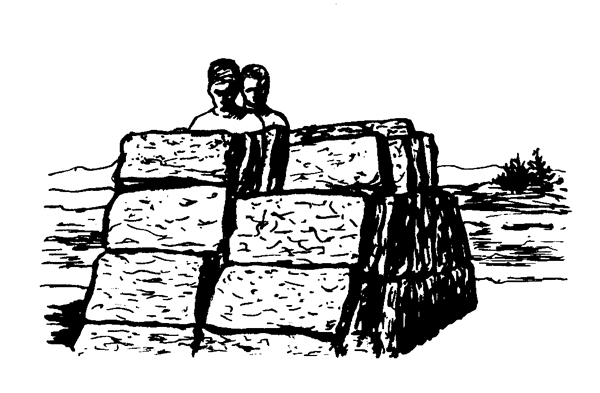
Figure 5. Partially cured adobes stacked in loose ricks.
Stacking is done via a certain method to prevent damage to the bricks. Place a center pillar of bricks laid flat, allowing for three to four rows of bricks stacked on edge. Table 2 list common sizes and weights of finished bricks.
Table 2. Common Sizes of Poured Bricks and Their Approximate Weights
|
Brick size (inches)
|
Weight (pounds) |
|---|---|
| 4 by 8 by 16 |
28
|
| 4 by 10 by 14 |
35-40
(most common and easily handled)
|
| 4 by 10 by 16 |
35
|
| 4 by 9 by 18 |
36
|
| 4 by 12 by 18 |
48
|
| 5 by 12 by 16 |
53
|
| 5 by 10 by 20 |
55
|
| 5 by 12 by 18 |
59
|
Adobe bricks gain strength with drying time, provided they are not exposed to rain or other moisture. Protect your work, but remember that the wind and the sun are your drying agents, and use judgment, too.
Some Dos and Don'ts
Do:
- Start small-until you learn the right blend. This may take months of experimenting.
- Use soils with high sand and low clay contents.
- Use a stiff mix.
- Select the time of year when the chances are best for a long drying season-May through August in most areas of New Mexico. Curing is important.
Don't:
- Build with adobe in areas subject to overflow or excessive rain or snowfall.
- Expect building with adobe to be cheap, unless labor and/or materials are cheap or free. Adobe bricks are cheap only when labor/materials are cheap.
Original author: Charles M. Hohn, Extension agricultural engineer.

Tom Dominguez is the Agriculture and Natural Resources Extension agent for Quay County. He earned his B.S. and Master of Agriculture Education at Sul Ross State University. A 15-year veteran of Extension education, his goal is to become a well-rounded agent with knowledge and skills in issues pertinent to Quay County residents and New Mexicans.
To find more resources for your business, home, or family, visit the College of Agricultural, Consumer and Environmental Sciences on the World Wide Web at pubs.nmsu.edu.
Contents of publications may be freely reproduced for educational purposes. All other rights reserved. For permission to use publications for other purposes, contact pubs@nmsu.edu or the authors listed on the publication.
New Mexico State University is an equal opportunity/affirmative action employer and educator. NMSU and the U.S. Department of Agriculture cooperating.
Reviewed and electronically distributed March 2011, Las Cruces, NM