Circular 457
Revised by Stephanie Walker and Israel Joukhadar
College of Agricultural, Consumer and Environmental Sciences, New Mexico State University
Respectively, Extension Vegetable Specialist/Professor and Assistant Professor. Department of Extension Plant Sciences/Plant and Environmental Sciences, New Mexico State University. (Print Friendly PDF)
Introduction
This publication provides general information for growing vegetables in home gardens in New Mexico. Use this publication with its companion, Circular 457-B, Growing Zones, Recommended Crop Varieties, and Planting and Harvesting Information for Home Vegetable Gardens in New Mexico (https://pubs.nmsu.edu/_circulars/CR457B/). Circular 457-B includes a map showing New Mexico growing zones, as well as a table providing crop variety recommendations, recommended planting dates, days to harvest, planting instructions, and yield information.

Eight Simple Steps for a Successful Garden
A well-planned vegetable garden can provide nutritious, high-quality, fresh vegetables for the whole family. A 50-ft by 100-ft garden will provide enough growing area for an average family. Though a well-maintained vegetable garden can be a lot of work, the outdoor exercise will mean better health for all involved.
These eight steps will lead to a successful garden:
- Know your climate
- Plan before you plant
- Prepare the soil
- Fertilize for optimal crop production
- Plant your garden
- Water properly to improve yields
- Control pests
- Harvest at the correct time
Know Your Climate
The types of vegetables that can be grown in home gardens in New Mexico are generally determined by the length of the growing season. There are eight major growing zones in New Mexico based on the average number of frost-free days and average annual extreme minimum temperatures (refer to Circular 457-B). Crops like okra and watermelons have difficulty maturing in areas with short growing seasons like Los Alamos. Kale, on the other hand, does not fare well in areas with hot summer weather like Roswell.
Growing periods for individual gardens within a zone may vary as much as 20 days due to microenvironments—variations in elevation, site exposure, soil type, and air drainage. Higher elevations generally have a shorter growing season. However, because cold air is heavier than warm air, it can drain into valley areas. Therefore, gardens in a valley in the spring tend to be colder than those on the upper slopes of the valley. Gardens with a southern exposure tend to warm up sooner in the spring than those with a northern exposure.
Gardeners can take advantage of microenvironments in the garden to extend the growing season. Planting watermelons near a block wall with a southern exposure increases the average temperature surrounding the melon vines. Heat absorbed by the wall during the day will radiate back to the atmosphere at night. Painting the wall black will increase the effect. Conversely, planting leaf lettuce on the north side of a house in the shade can help extend its growing season into the late spring. Cooler, shady growing conditions reduce respiration, keeping sugar levels higher in the plants. Raised beds warm up sooner in the spring than a level garden. Maximum effect is achieved by planting on the south side of a bed running east to west. Beds can be mounded up with a shovel or contained with lumber or bricks.
Soil and ambient temperatures can also be modified using various types of mulches. Organic mulches like dry bluegrass or fescue clippings (no more than 1 in. deep) tend to cool the soil. Do not use common Bermuda grass clippings, which may contain seed or stolons (modified stems) that may root. Weed-free straw makes excellent mulch. Organic mulches should be used around cool-season crops like lettuce or spinach.
Synthetic clear and black plastic mulches help warm the soil and promote early spring growth of warm-season crops like tomatoes and melons. Black plastics are preferred because weeds can germinate under clear plastic. However, many gardeners are replacing black plastic with black perforated plastic or landscape fabrics (weed barriers) that allow the soil to breathe and water to penetrate. White plastic (non-translucent) and aluminum foil mulches help cool the soil (aluminum foil also tends to repel aphids).
Jars, bottles, or hot caps can be placed over seeds and transplants in the garden during the early spring to speed germination and early growth of both cool- and warm-season vegetables. Containers may need to be removed during the heat of day for ventilation. Plastic sleeves filled with water that absorb heat during the day are often placed around tomato transplants during the spring to protect them from freezing at night.
Plastic grow tunnels may be used in larger gardens to protect a whole row of tomato or melon plants in the spring. Some products have vertical slits that permit ventilation during the hot part of the day. Row covers of opaque woven polyester allow air and water to penetrate while warming the soil and plants beneath. Row covers over single-stem plants (such as tomatoes) may have to be supported with wire hoops to keep them from blowing in the wind and damaging plants. Outside edges should be kept in place with soil.
Transplants can be grown in cold frames, hot beds, or greenhouses and later transferred to the garden to get crops off to an early start. Since management of these “growth chambers” is quite intense, most gardeners prefer to buy transplants from a local nursery.
Plan Before You Plant
When selecting the site for your garden, make sure the soil is deep and well-drained. Hardpans (compacted layers of soil) and caliche (layers of calcium carbonate) near the soil surface can become major problems. Raised beds may need to be used if drainage problems cannot be solved.
Most vegetables, whether grown in short or long growing season areas, prefer full sun. Vegetable gardens should be located away from trees that may shade the garden. Tree roots may also compete for water and nutrients. Windbreaks (such as trees, fences, and walls) a safe distance to the southwest of the garden are encouraged to protect young seedlings from prevailing winds in the spring. Fences may be needed to protect crops from rodents, stray pets, or wildlife.
The garden should have easy access to water and tools used to work the soil. Aesthetics may dictate that the garden be hidden from public view, especially unsightly compost piles. The size of the garden depends on your available time, family needs, land availability, and water requirements.
The size of the garden also dictates what types of crops you can grow. Crops like leaf lettuce, spinach, radishes, and other vegetables that occupy relatively little space are the crops of choice in smaller gardens. Sprawling vine crops like pumpkins or watermelons need substantial space. Determinate or “bush” vine crop varieties require less space and can be considered for smaller gardens.
Make a list of vegetables you would like to grow. Consider how much space is available, how many people are in your family and their taste preferences, as well as your facilities for canning, freezing, or drying surplus produce. Make sure there is enough garden space to raise all the vegetables you want to grow.
Before ordering seed in the winter, make a map of your garden to scale to determine placement of crops throughout the growing season. Taller crops like corn should be placed on the north side of the garden where they will not shade shorter crops. Shade-tolerant leafy vegetables can be grown in partial-shade areas. Mapping your garden also helps in crop rotations. Closely related crops often have the same insect or disease problems and should not follow each other in a crop rotation.
A number of techniques can be used to grow more crops in the same area. For example, radishes planted in the early spring can be replaced by green beans in the summer. The green beans, in turn, can be replaced by fall-planted garlic. This process of planting three crops one after another in the same growing season is called “succession” planting. Crops like pumpkins will tolerate partial shade and can be planted between sweet corn. This is called “intercropping.” The heavy leaf cover from the pumpkins will shade out most weeds under the corn for natural weed control. Highly colored crops like ‘Ruby’ leaf lettuce or herbs with pretty flowers like chives, sage, or dill can be planted in flowerbeds for their aesthetic value, creating an edible landscape. Melons and cucumbers can be trained up fences to save room and help prevent fruit rots.
Order seed early from reputable companies to ensure high-quality seed. Do not save seed from hybrids planted the year before, since the seed will not produce “true-to-form” progeny. If possible, order varieties with resistance to diseases that plague your garden. Check with your neighbors, friends, or your local Cooperative Extension Service office for recommendations on varieties that have performed well in your area. “All-American” varieties do well in most locations. Try several varieties, taking notes on performance throughout the season. Your notes can be used the following year in making decisions on what varieties to order.
Prepare the Soil
The ideal soil should be deep, well-drained, and fertile, and should contain plenty of organic matter and retain moisture well. It should also be friable (easily worked) and reasonably free of stones. Soils vary in texture (size of soil particles) from sandy (coarse particles) to clay (fine particles). Silts fall between sandy and clay textures, while loams are mixtures of all three particle sizes. Sandy soils tend to be low in fertility and do not hold water well. Clay soils often drain poorly, crack severely when dry, and become very sticky when wet. Sandy loam soils are ideal for producing most vegetables.
Most soils in New Mexico are low in organic matter, and adding organic matter to your garden soil will help improve its structure. Adding organic matter to sandy soil improves both its water-holding capacity and its cation exchange capacity, or the ability of the soil to retain nutrients for plant uptake. Adding organic matter to clay soils aerates these soils and improves their drainage.
One of the easiest ways to add organic matter to your garden soil is to apply livestock manure at a rate of 50-100 lb/100 ft2. Use lighter rates when applying chicken manure since it tends to be a “hotter” manure (higher in nitrogen) than manure from larger livestock like cattle and horses. Fresh manure should only be applied in the fall so it has time to break down in the soil. Heat-treated or composted manures are preferred because fresh manure can introduce weed seeds into the garden. Fresh manure applied in the spring often burns young seedlings due to the high salt content of the manure.
Large amounts of organic matter can be added to the soil using “green manure” crops—crops that are grown specifically to be incorporated back into the soil. The most popular green manure crops are winter wheat, barley, oats, and rye. Seed can be obtained from most local farm feed stores and should be liberally scattered around the garden in late summer or early fall. Rake the seed into the soil around existing vegetables, then water. After the first frost, pull up frost-damaged summer vegetables, leaving a “carpet” of grass (green manure) to develop in late fall. A little nitrogen fertilizer applied the following spring will speed growth. Approximately one month before planting your garden, the green manure crop should be thoroughly rototilled into the soil. A little extra nitrogen fertilizer will help microorganisms in the soil rapidly break down organic matter.
Most gardeners find the easiest way to add organic matter to the soil is to apply compost. Compost is often made from leaves, grass clippings, food waste, and garden vegetable waste from the previous growing season. A 1- to 2-in. layer of well-decomposed compost can be incorporated into the soil before planting. Most New Mexico soils tend to be alkaline, which makes some soil nutrients like phosphorus, iron, and zinc unavailable for plant uptake. Well-decomposed compost (often called humus) contains humic acid, and when added to alkaline soils, it helps to make these nutrients more available for plant uptake.
Compost and manure also contain a wide variety of nutrients. Because the nutrients are in an organic form, they tend to be more stable in the soil and more available for plant uptake over a relatively long time. They do not, however, occur in large quantities, and thus most gardeners rely on commercial fertilizers for optimal plant growth.
Fertilize for Optimal Crop Production
Optimal soil fertility leads to high crop yields. Achieving this balance is most effectively done by combining organic matter with commercial fertilizers. Testing your soil can help you determine the specific nutrients your garden needs. Contact your local county Extension agent for information on soil testing; you can also consult NMSU Cooperative Extension Guide A-146, Appropriate Analyses for New Mexico Soils (https://pubs.nmsu.edu/_a/A146/).
Most commercial fertilizers contain one or more of the three major plant nutrients: nitrogen (N), phosphorus (P), and potassium (K). When a fertilizer contains all three elements, it is a “complete” fertilizer. The label on a fertilizer bag indicates the percentages of nitrogen, phosphorus (P2O5), and potassium (K2O) in the fertilizer. A 50-lb fertilizer bag with an analysis of 5-10-10 contains 5% nitrogen (2.5 lb), 10% phosphorus (5 lb of P2O5), and 10% potassium (5 lb of K2O).
An “incomplete” fertilizer may contain only one of the nutrients, as in the case of 0-46-0. This incomplete fertilizer is also called a “high-analysis” fertilizer because the amount of phosphorus it contains (46% P2O5) is relatively high compared to the amount in a 5-10-10 fertilizer.
Most New Mexico soils contain sufficient potassium for good vegetable growth, although it is wise to have an analysis of your soil to make sure. Nitrogen is important for vegetative growth, particularly in leafy salad crops and corn. A nitrogen deficiency will appear as an overall yellowing, or chlorosis, of the older leaves because any nitrogen moves first to younger leaves. Phosphorus is important for fruit and root growth. Phosphorus deficiency generally appears as a purple coloration of the leaves. It should not be confused with natural, purple coloration in some plants (such as ‘Ruby’ leaf lettuce) or certain disease symptoms (such as purple tomato leaf veins associated with beet curly top virus).
If no soil test recommendations are available, apply a complete fertilizer that is relatively high in phosphorus (5-10-5) before planting. Since phosphorus does not move or leach readily with soil water, it should be broadcast across the garden at a rate of 2.3 lb/100 ft2 of 5-10-5 and incorporated into the soil to a depth of 4-6 in. This should provide sufficient nutrients for most root crops. The application rate should be cut back proportionally if a high-analysis fertilizer is used.
Leafy vegetables will probably require supplemental nitrogen later in the season. Since nitrogen fertilizers readily dissolve in water, they should be applied several times throughout the season in split applications, usually after thinning, just before flowering, or as needed. Ammonium sulfate (21-0-0) can be applied in increments at rates of 1/4-1/3 lb/100 ft2, either broadcast (hoed-in) or “banded” 1-2 in. deep to the sides of the plants (4-5 in. from plants) along the edges of the beds. The fertilizer should be covered with soil and watered immediately to prevent the nitrogen (ammonia) from volatizing and escaping into the atmosphere.
Most other nutrients required for good plant growth can be supplied through natural soil fertility, compost, or manure. However, minor elements like iron may not be readily available for plant uptake in alkaline soils. An iron deficiency will appear as yellowing, or chlorosis, between the veins of younger leaves. Iron is not mobile and does not move from older leaves to younger leaves. Applying iron chelate to the soil makes the iron more available for plant uptake. Iron chelate or iron sulfate can also be applied to foliage, but the results are often only temporary (do not apply iron sulfate to soil). For best results, follow label instructions on all fertilizers.
Plant Your Garden
Plants can be established in the garden either by direct seeding or by transplanting. Planting seeds directly into the soil where they will grow is the easiest and most basic method of starting vegetables in a garden. It is also less costly in terms of both time and money. Transplants are often used in cooler areas where growing seasons are short, so vegetables have more time to mature before the first frost.
Before direct seeding, make sure the soil is adequately prepared and well-conditioned. Use a garden rake to level the garden and remove stones and other debris. Raised beds can be formed by using a shovel and rake to level the top of the bed. Create a guide for planting seed rows by stretching a string close to the ground between two stakes. How deeply you plant seeds will depend on the type of seed (refer to Circular 457-B). A general rule of thumb is to plant most seed at a depth equivalent to four times the diameter of the seed, using twice as many seeds as necessary to ensure a good stand. Carefully cover the seeds with soil and gently pack the soil with the back side of a hoe, making sure the seeds are not covered deeper than recommended. For soils that are heavy, compact when wet, or tend to form a crust, it is helpful to plant seeds in a shallow furrow and cover them with vermiculite. Seeds can germinate easily through vermiculite.
Keep the seedbed moist until the seeds germinate. Once the plants have developed one or more true leaves, thin plants to the recommended spacing. Crops like beets, lettuce, spinach, Swiss chard, and onions can be thinned late, and the thinned vegetables can be used in salads.
Another technique for direct seeding is the hill method, which works well for vegetables that should be planted deeper in the soil. Squash, melons, cucumbers, corn, and even chile are often planted in hills. Check the recommended plant spacing for specific vegetables. Use a hoe to make a hole in the soil, then drop four or five seeds in the bottom of the hole. Cover with soil and firm with the back of the hoe. Thin to one to three of the most vigorous seedlings after emergence when plants have their first true leaves.
Think of your garden as three gardens in one-a spring garden, a summer garden, and a fall garden. Planting dates for each will depend on the hardiness of the vegetable and when you want your crop to mature. Hardy cool-season crops can be planted early in the spring (Table 1) or in the summer for a fall crop, while warm-season crops should be planted only after all danger of frost has passed in the spring.
|
Table 1. When to Plant Cool-season and Warm-season Vegetables |
||
|---|---|---|
|
Cool-season Vegetables |
||
|
Hardy: Plant these as soon as the ground can be worked in the spring, or plant in summer for the fall garden. |
||
|
Broccoli |
Collards |
Peas |
|
Brussels sprouts |
Kale |
Radishes |
|
Cabbage |
Kohlrabi |
Mustard |
|
Chinese cabbage |
Spinach |
|
|
Turnips |
Onions |
|
|
Cool-season Vegetables |
||
|
Half-hardy: Plant these near the average date of the last killing frost, or plant in summer for the fall garden. |
||
|
Beets |
Endive |
Potatoes |
|
Carrots |
Cauliflower |
Celery |
|
Parsnips |
Swiss chard |
Lettuce |
|
Warm-season Vegetables |
||
|
Tender: Plant these after all danger of frost. |
||
|
Snap beans |
Sweet corn |
Black-eyed peas |
|
Tomatoes |
||
|
Warm-season Vegetables |
||
|
Very Tender: Plant these after all danger of frost and when temperatures are consistently warm. |
||
|
Cucumber |
Okra |
Winter squash |
|
Eggplant |
Bell pepper |
Summer squash |
|
Lima bean |
Chile |
Sweet potato |
|
Muskmelon |
Pumpkin |
Watermelon |
Cool- and warm-season crops may mature earlier if transplants are used. Transplants can be purchased from nurseries and garden centers. Although purchased transplants are more expensive, they are more convenient because you do not have to start your own plants.
Home gardeners can also start their own transplants either indoors in flats or other containers, or outdoors in cold frames or hotbeds. Start transplants six to eight weeks before setting them in the garden.
Success in growing your own transplants depends on several factors, beginning with a disease-free growing medium. Using a well-balanced soil mixture from a local nursery will limit problems from soilborne diseases and weed seed. Soil can be placed in plant trays, flats, or individual pots (plastic or peat). Plants can also be started in individual soil pellets.
Most vegetables germinate well at a daytime temperature of 70°F (nighttime 60°F). Depending on the type of vegetable, up to six to eight hours of direct sunlight are needed per day. Less light tends to make plants “leggy.” Direct sunlight can be supplemented with light from grow lights (6-8 in. above seedlings). Plants grown in flats or trays can be transferred to individual pots as soon as they can be handled. Leave at least 2 in. between pots for good air circulation.
Whether you use purchased or homegrown transplants, “harden off” the transplants before planting them into the garden. Hardening off is the process of adjusting seedlings to their future outdoor environment. Set transplants outdoors in a semi-protected area (preferably shaded) for a few hours each day, gradually increasing their outdoor exposure a few hours each day. Withhold water gradually. Seedlings should be ready to transplant into their permanent locations in a week.
Water plants just before transplanting. This will help keep roots from drying out and will help when removing plants from plastic pots (by tapping on the pot bottom). Transplant in the evening when it is cool. This will give plants time to adjust to their new environment before confronting the sun the next day. The garden soil should be relatively moist when transplanting. Be sure to firm the soil over the root ball and water immediately. If transplants are in peat containers, plant deep enough to cover the top of the pellet, cube, or pot, or tear off the top of the pot so that it is fully planted below the soil line. If the container top is above the soil, it will act as a wick and dry out the plants. It is also recommended that the bottom of the peat container be torn off so that plant roots do not become root-bound if it fails to degrade in the soil. Irrigate immediately after planting in the garden.
Water Properly to Improve Yields
Because of our dry climate, irrigation is essential in New Mexico’s gardens. Too little water can induce plant stress, reducing both quality and yield. However, overwatering can cause root rot or may cause plants to remain overly vegetative rather than producing fruit. A careful balance of providing the optimal irrigation to plants as they grow will prevent plant stress from either under- or overwatering and will contribute to healthy, high-yielding crops.
After planting the garden, maintain moist soil until seeds germinate and plants are established. After plant establishment, water less frequently but more deeply (wet soil at least 12 in. deep). Allow the surface soil (the top ½-1 in.) to dry out between irrigations, which will promote deeper root growth, eventually making plants more drought-tolerant. If the soil is sandy, it may be necessary to water every 3-7 days. Watering every 8-12 days may be more appropriate for heavier soils. The watering frequency is also dependent on weather—more frequently during hot weather and less when it’s cool.
Furrow irrigation is often used in New Mexico. Vegetables can be planted on the outside edge(s) of a raised flat vegetable bed. When irrigating, never allow the water to run over the top of the bed because this causes a soil crust. Water should be allowed to soak through the bed by capillary action until the water reaches the middle of the bed. This technique concentrates salts from the water and soil into the middle of the bed and away from the plants.
Most home gardeners prefer to use sprinklers to irrigate their gardens because they are easy to use. Sprinklers, however, tend to be very inefficient because much of the water can be lost to the atmosphere, especially on windy days. Soil crusting can be a major problem. If you do use sprinkler irrigation, irrigate in the morning to give plants a chance to dry off. Sprinkling in the late afternoon or at night can increase the incidence of foliage diseases like powdery mildew.
Drip irrigation is the most efficient way to water. Drip lines should be placed near the plant, so water moves evenly out away from the base of the plant. As with furrow irrigation, this will concentrate salts away from the plant. The garden may have to be occasionally flood irrigated to move accumulated salts down through the soil profile.
Control Pests
Pests (insects, birds, rodents, etc.), diseases, and weeds interfere with the optimal growing conditions for a specific crop. Weeds compete with vegetables for water, nutrients, and light. Cultivation and mulches are the most efficient ways of controlling weeds in the home garden. Cultivation in small gardens is generally done with a hoe. Be careful not to cultivate too deeply, which could damage crop roots. Mulches help shade the ground, preventing germination of most annual weed seeds. Controlling weeds with herbicides is discouraged unless you have a very large garden.
The key to controlling insects and diseases in the garden is proper identification. Publications on identification and control of these pests can be obtained from your local county Extension agent or online at https://pubs.nmsu.edu/. Be sure to follow the instructions on the label when using any pesticide. Where possible, plant resistant varieties and use good cultural techniques to control these pests.
Harvest at the Correct Time
Knowing when to harvest vegetables will help you get the best quality vegetables. Many gardeners allow produce to pass their prime, when vegetables are less tender and more fibrous. Refer to Table 2 to determine the best time to harvest vegetables.
|
Table 2. The “Pick Prime Produce” Chart |
||||
|---|---|---|---|---|
|
Vegetable |
Part Eaten |
Too Early |
Optimal |
Too Late |
|
Asparagus |
Stems |
Insufficient length |
6–8 in. long, no fiber |
Too much woody fiber in stem |
|
Lima beans |
Seeds |
Pods too small |
Bright green pods, seeds good size |
Pods turned yellow |
|
Pole green beans |
Pods and seeds |
Too small |
Bean’s cavity full, seeds 1/4 grown |
Seeds large, pods fibrous |
|
Snap bush beans |
Pods and seeds |
Too small |
Pods swollen, seeds just visible |
Pods fibrous, seeds large |
|
Beets |
Roots and leaves |
Too small |
Roots 2–3 in. in diameter |
Roots pithy, strong taste |
|
Broccoli |
Immature blooms |
Too small |
Bright green color, head still |
Head loose, some blooms beginning |
|
Brussels sprouts |
Heads |
Too small, hard to harvest |
Bright green, tight heads |
Heads loose, color change to green-yellow |
|
Cabbage |
Heads |
Insufficient leaf cover |
Head firm, leaves tight |
Leaves loose, head cracked open |
|
Cantaloupe |
Fruits |
Stem does not want to |
Stem easily breaks away from fruit when pulled |
Background color of melon is |
|
Carrots |
Roots |
Too small |
1/2–3/4 in. at shoulder |
Strong taste, overly sweet |
|
Cauliflower |
Immature blooms |
Head not developed |
Head compact, fairly smooth |
Curds open, separate |
|
Celery |
Stems |
Stems too small |
Plant 12–15 in. tall, stems medium thick |
Seed formed, bitter taste |
|
Collards |
Leaves |
Leaves too small |
Bright green color, small midrib |
Midrib large and fibrous |
|
Corn, sweet |
Grains |
Grains watery, small |
Grains plump, liquid in milk stage |
Grains starting to dent, liquid |
|
Cucumber |
Fruits |
Too small |
Skin dark green, seeds soft |
Skin beginning to yellow, seeds hard |
|
Eggplant |
Fruits |
Too small |
Very glossy skin, side springs |
Seeds brown, side won’t spring back when mashed |
|
Lettuce, head |
Leaves |
Head not fully formed |
Fairly firm, good size |
Head very hard |
|
Okra |
Pods |
Too small |
2–3 in. long, still tender |
Fiber developed, pods tough |
|
Onions, dry |
Bulbs |
Tops all green |
Tops yellow and 3/4 fallen over |
All tops down, bulb rot started |
|
Peas, English |
Seeds |
Peas immature and |
Peas small to medium, sweet, |
Pods yellow, peas large |
|
Peas, black-eyed |
Seeds and pods |
Peas immature and |
Seeds fully developed but still soft, pods soft |
Seeds hard, pods dry |
|
Potato |
Tubers |
Too small |
Plant tops begin to die back |
Damaged by freezing weather |
|
Rhubarb |
Stems |
Stems small, immature |
Stems 8–15 in. long are best |
Fleshy stem becomes fibrous |
|
Soybeans |
Seeds |
Seeds not developed |
Pods thick, bright green |
Pods dry, seeds shatter out |
|
Squash, summer |
Fruits |
Too small |
Rind can be penetrated by |
Rind difficult to penetrate by thumbnail |
|
Squash, winter |
Fruits |
Rind soft |
Rind difficult to penetrate |
Frost damage |
|
Sweet potato |
Roots |
Too small |
Most roots 2–3 in. in diameter |
Early plantings get too large and crack; damaged by soil temperature below 50°F |
|
Watermelon |
Fruits |
Flesh green, stem green |
Melon surface next to ground turns from light straw color to a richer yellow |
Top surface has dull look |
|
Tomatoes can be harvested in three stages.
|
||||
|
Peppers (bell and chile) can be harvested in three stages.
|
||||
Recommendations for Specific Vegetables
The Perennial Vegetables
Asparagus and rhubarb are perennial vegetables common in many New Mexico gardens. Because asparagus and rhubarb require more than a year to mature, plant them in an area that will not interfere with tilling and other garden activities.
Asparagus
Asparagus, a member of the lily family, is winter-hardy and fairly tolerant of heat, drought, and salinity. It grows wild along ditch banks in New Mexico but produces its finest shoots (spears) in a well-fertilized, rich soil. Once established, a well-maintained bed will produce for 10-15 years.
Asparagus is generally established from 1-year-old crowns spaced 12-18 in. apart in a trench 8 in. deep. The bottom of the trench should be a mixture of soil and compost. Cover crowns with a 2-in. layer of soil and compost. Allow spears to form ferns in the first growing season. As ferns develop, backfill with soil and compost until a raised bed of ferns and enriched soil is formed.
The following spring, spears can be harvested (4-8 week period) with a knife or by snapping them off at the soil surface. Stop harvesting when the average spear diameter is less than 1/4 in. Allow ferns to develop to replace carbohydrates in the root system for next spring’s crop. Fertilize ferns with nitrogen fertilizer after harvest to promote good growth. Remove ferns during the winter and topdress with weed-free manure.
Older varieties of asparagus (such as ‘Mary Washington’) produce both male and female plants. New all-male hybrids (such as ‘Jersey Giant’) produce greater yields because male plants don’t form seed-containing berries, so more energy is diverted to spear production. All-male hybrids also tend to have more tolerance to diseases such as Fusarium wilt.
Rhubarb
Rhubarb does well in cooler areas of New Mexico but has not proven successful in warmer southern areas of the state (try afternoon shade to cool plants). Native to southern Siberia, rhubarb will grow to a height of 4 ft., with large basal leaves and edible leafstalks (petioles) 15-30 in. long. Leaf blades contain oxalic acid and are poisonous.
Propagate rhubarb in the spring using crown divisions purchased from a local nursery or catalog. Cut crowns into small sections with one good eye per section. Plant sections 3 ft. apart in a trench 2-3 in. deep, reinforced with compost below the trench, and cover with soil. Do not allow “seed pieces” to dry out.
Do not harvest the first year after establishment. This allows carbohydrates to build up in the roots. Harvest only the largest and best leaf stalks in late spring during the subsequent growing seasons. Stalks separate readily from the crown when grasped near the base of the stalk and slightly pulled. Remove any seedstalks that form to maintain plant vigor. Petioles or stalks may be either red (in varieties such as ‘Valentine’) or green (‘Victoria’).
Onion Family
The onion and its relatives belong to the Amaryllidaceae family, Allioideae subfamily (Figure 1). In most cases, the fleshy basal leaves constitute the edible part of the vegetable. Most are valued primarily for their pungency and flavoring characteristics.

Figure 1. An onion plant with a close to mature bulb.
Onions
Onions vary in size, shape, and coloring. Most gardeners plant onions from “sets” (small bulbs), transplants, or seed (primarily in southern New Mexico). Onions are sensitive to weather, preferring cool weather to grow tops and warm weather to produce bulbs. Day length is also important, and there are long-, intermediate-, and short-day onion varieties. Most long-day varieties require 14-16 hours of daylight to bulb, while short-day varieties require only 12 hours as weather warms in the spring.
Two onion crops (direct-seeded) can be grown in southern New Mexico. Short-day onions planted in late September or early October will make mature bulbs in June, while intermediate-day onions planted in January and February can be harvested in mid- to late summer. Long-day onions may not form bulbs when planted in New Mexico.
In central and northern New Mexico, only plant onions in the spring. Intermediate-day onions planted (direct-seeded) in the spring should mature by late summer or fall. Onion sets or transplants should be used for earlier plantings.
Onions are ready to harvest when the tops begin to turn yellow and fall over (lodge). When half to three-quarters of the tops have fallen over, bend the remaining tops down to slow the growth process. After the tops turn brown, cure onions by pulling or digging them up with a garden fork and placing them in a well-ventilated, shady area. After curing, tops can be cut 1 in. above the shoulder of the bulb. Store onions in a cool, dry, well-ventilated area.
Scallions
Scallions can be harvested from bulbing onions (Allium cepa) before the onions begin to bulb or non-bulbing bunching onions (Allium fistulosum). Some varieties are grown specifically for this purpose, although most gardeners simply harvest green onions while thinning their bulb crop.
Garlic
Garlic is a hardy, bulbous plant with flat, solid leaves. The bulb is composed of 5-16 cloves enclosed by a thin white or pink skin. Separate garlic cloves before planting. In general, garlic cloves should be planted in the fall. When leaves turn yellow in mid-summer the following year, lift the bulbs and allow them to cure in the shade for several days. Cut off the tops (similar to an onion) or braid them together, leaving the bulbs outside the braid. Store garlic in a dry, well-ventilated place.
There are generally two types of garlic: hardneck (which forms a seedstalk) and softneck (which does not form a seedstalk). Most hardneck varieties do not produce true seed, but form bulbils or bulblets in a cluster on the end of the seedstalks. Bulblets can be planted in the spring and will form an unsegmented “round” bulb by fall. Left undisturbed, the “round” will form a segmented bulb the following summer.
Leeks
Leeks take 80 days to grow from transplants and 130 days from seed. When growing from seed, sow in early spring and thin to about 3 in. apart. Leeks do not form a bulb (except elephant garlic, which is a form of leek), but are harvested when the neck of the plant at the surface of the soil is at least 1 in. in diameter. Leeks are often blanched by banking the soil up around the base of the plant as they grow. Leaves are flat, similar to those of garlic.
Shallots
Shallots are “multiplier-type” onions, which means they rarely produce seed and instead divide into a number of cloves. Harvest when the tops are down in summer or in immature stage. Shallots are hardy and overwinter as perennials.
Chives
Chives grow in thick tufts, producing small, oval bulbs in a compact mass. The lavender flowers (garlic chives have white flowers) make it a good plant for a flower or a vegetable garden. Harvest by snipping the leaves with scissors.
Cruciferous Crops
Members of the Brassicaceae, or cabbage, family are frequently referred to as cole or cruciferous crops. This family group rates high in hardiness, ease of culture, rewarding yields, and the variety they add to meals. Most are cool-season vegetables, performing best if they mature when temperatures are relatively cool.
Cabbage
Cabbage is one of the oldest vegetables on record (Figure 2). Among the modern cultivated forms, some have elongated heads, some rounded, and others rather flat. Leaves may be light or dark green, red, or purplish. Some leaves are smooth while others are crinkled (savoyed).

Figure 2. A maturing cabbage head.
Cabbage grown for a spring crop (early maturing varieties) is probably best established from transplants, so it matures in relatively cool weather. Cabbage that matures in hot weather often has a strong taste and tends to split. Highest quality is obtained when cabbage is direct-seeded in mid-summer to mature in the fall when temperatures are cool. Cool weather reduces respiration, causing sugars to accumulate in the head, which results in superior flavor.
Cauliflower
Cauliflower requires the same cultural techniques as cabbage but is more delicate. Transplant early maturing varieties in the spring to mature in cool weather. Cauliflower grows best in New Mexico when direct-seeded or transplanted during mid-summer for a fall crop.
When the cauliflower plants begin to form a small head (button), pull the leaves over the head and tie them together to protect the head from the sun. Newer varieties are often self-blanching, with leaves that naturally curve over the head. Harvest the head or curd (thickened clusters of immature flowers) before it starts to spread and become “ricey” (develops pistils and anthers). If they have been well protected from the sun, heads should be pearly white; exceptions are the purple- or orange-headed varieties, which lose their color when cooked in boiling water.
Broccoli
Broccoli, like cauliflower, is grown for its edible, immature flower head. Direct-seeding broccoli in mid-summer to mature in the fall when temperatures are cool is preferred. When the center head is removed, numerous small side shoots (heads) will form that can also be harvested for several weeks. Heads that mature in late spring, when temperatures are hot, tend to turn brown, be fibrous, have a strong taste, and often have leaves that grow up through the head.
Brussels sprouts
Brussels sprouts should be direct-seeded in the garden during the late spring for a fall crop. Small heads or sprouts form on the main stem (2 ft high or more), maturing from the bottom up. Sprouts that mature in warm weather late in the summer tend to split. Later sprouts that mature in cooler weather will be firm and smooth. A week before a hard frost is expected, “top” the plant with a knife. This will force all remaining energy in the plant into maturing those sprouts that are left on the plant.
Kohlrabi
Kohlrabi is a relatively novel plant (Figure 3). It is grown for its enlarged or swollen basal stem and its mild, turnip-like taste. It looks like a turnip growing on top of the ground with leaves sprouting from the enlargement. As with other cruciferous crops, for optimal quality, it should be grown to mature in the fall.

Figure 3. Harvested kohlrabi.
Greens and Salad Crops
Most greens and salad crops, such as lettuce, spinach, Swiss chard, collards, and kale, are cool-season crops that should be sown early before temperatures are too warm. These vegetables also make excellent fall crops. Greens are among the most nutritious of all vegetables.
Lettuce
Lettuce is native to both Europe and Asia. This cool-season vegetable germinates best at 65-70°F. Temperatures above 79°F tend to inhibit germination. Seeds are quite small, and they should be sown shallowly and kept moist until emergence. After emergence, begin thinning; thinned plants can be used in salads.
There are basically four types of lettuce grown in New Mexico gardens. Crisp head or iceberg lettuce forms a head of large, heavy, tightly folded leaves. It is slightly more difficult to grow than other types. In northern New Mexico, plant it in the early spring for a fall crop. In southern New Mexico, seed can be sown in late fall and early winter for a spring crop.
Leaf lettuce is the most popular of the homegrown types. By far the easiest type to grow, it will mature in as little as 45 days. Different varieties can be grown for a wide variety of flavors, textures, and colors in salads.
Butterhead lettuce forms a loose head of crumpled leaves with a soft, buttery texture. It is one of the tastiest lettuces.
Romaine, also called cos lettuce, develops elongated heads of long leaves with heavy midribs. The outer leaves tend to be somewhat coarse and dark green. Inner leaves are lighter green and more finely textured. It has a crisp, sweet flavor and adds crunch to a salad.
Spinach
Spinach is used both as a cooked green (potherb) and in salads. It is characterized by a compact rosette of leaves that may be crinkled (savoy) or smooth. Grown mostly in the spring, flowering (bolting) occurs in response to an increase in day length and temperature. Thin several times; thinned plants can be used in salads. At maturity, harvest the entire plant or harvest older leaves as they mature. The latter technique results in a longer harvest and greater yields. Spinach can also be sown in the late summer for a fall crop.
New Zealand spinach, unlike most other greens, is a warm-season crop with a flavor similar to spinach but without its astringency. Seeding should be delayed until after frost and the soil temperature is at least 50°F. The heavily branched stems bear thick, dark green, succulent, triangular leaves.
Swiss chard
Swiss chard is a delicious, productive, and almost foolproof vegetable crop. Not only is Swiss chard almost indestructible, unlike other cool-season vegetables it will continue to produce through hot weather. This vegetable can be used fresh in salads or cooked like spinach. Midribs of the leaves can be steamed like asparagus spears.
Collards and kale
Collards and kale are highly nutritious and are both grown to be used as greens. Collards have broad, flat, or slightly furrowed leaves, while kale leaves tend to be more crinkled. Whole plants can be harvested when small, or older leaves can be harvested from the ground up as plants mature. Best taste occurs in the fall during cold weather.
Root Crops
Root crops are popular in home gardens. Most are cool-season vegetables, which can be planted either in the early spring or late summer for a fall crop. Many can be stored over winter in the soil where they were grown by covering them with a straw mulch to keep the soil from freezing.
To ensure root crop success, gardeners must thin crops to the recommended spacing. This is essential to reduce competition among plants, which can result in poor quality and misshapen roots.
Beets
Beets are valuable both for their roots and greens (Figure 4). Most beet seedlings produce three to five seedlings in a tight clump, so thinning is important. Thinned plants make very tasty greens. The roots consist of alternating circular bands of tissue that give beets a banded appearance.

Figure 4. Chioggia beets with classic bullseye coloration.
Radishes
Radishes are one of the easiest crops to grow in the home garden. Plant them in early spring because they will not tolerate hot weather. Radishes mature 3-6 weeks after seeding and can be planted as a spring or fall crop. Stagger plantings at one- to two-week intervals for continuous harvest
For best quality, make sure radishes have an even supply of nutrients and water. Stressing the plants for water or allowing them to mature in hot weather can cause them to be pithy and pungent.
Radish roots vary in size, color, shape, and texture. The most popular are the round ‘Cherry Belle’ types, which are relatively mild and mature quickly (Figure 5). ‘White-icicle’ types tend to be slightly more pungent and take slightly longer to mature. Winter radishes are very pungent, require a relatively long growing season, and are generally harvested in the fall.

Figure 5. Cherry belle radishes.
Carrots
Carrots have very small seeds and require shallow planting and even moisture until they emerge. Plants can be thinned several times, and baby carrots can be used in salads. Optimal root growth occurs at 60-70°F. The soil should be porous and friable in texture to ensure unimpeded growth of the root (for symmetrical, straight roots). Carrot varieties differ primarily in size and shape (Figure 6). Shorter types can be used in heavier soils. Miniature or Amsterdam types are often grown specifically for baby carrots.
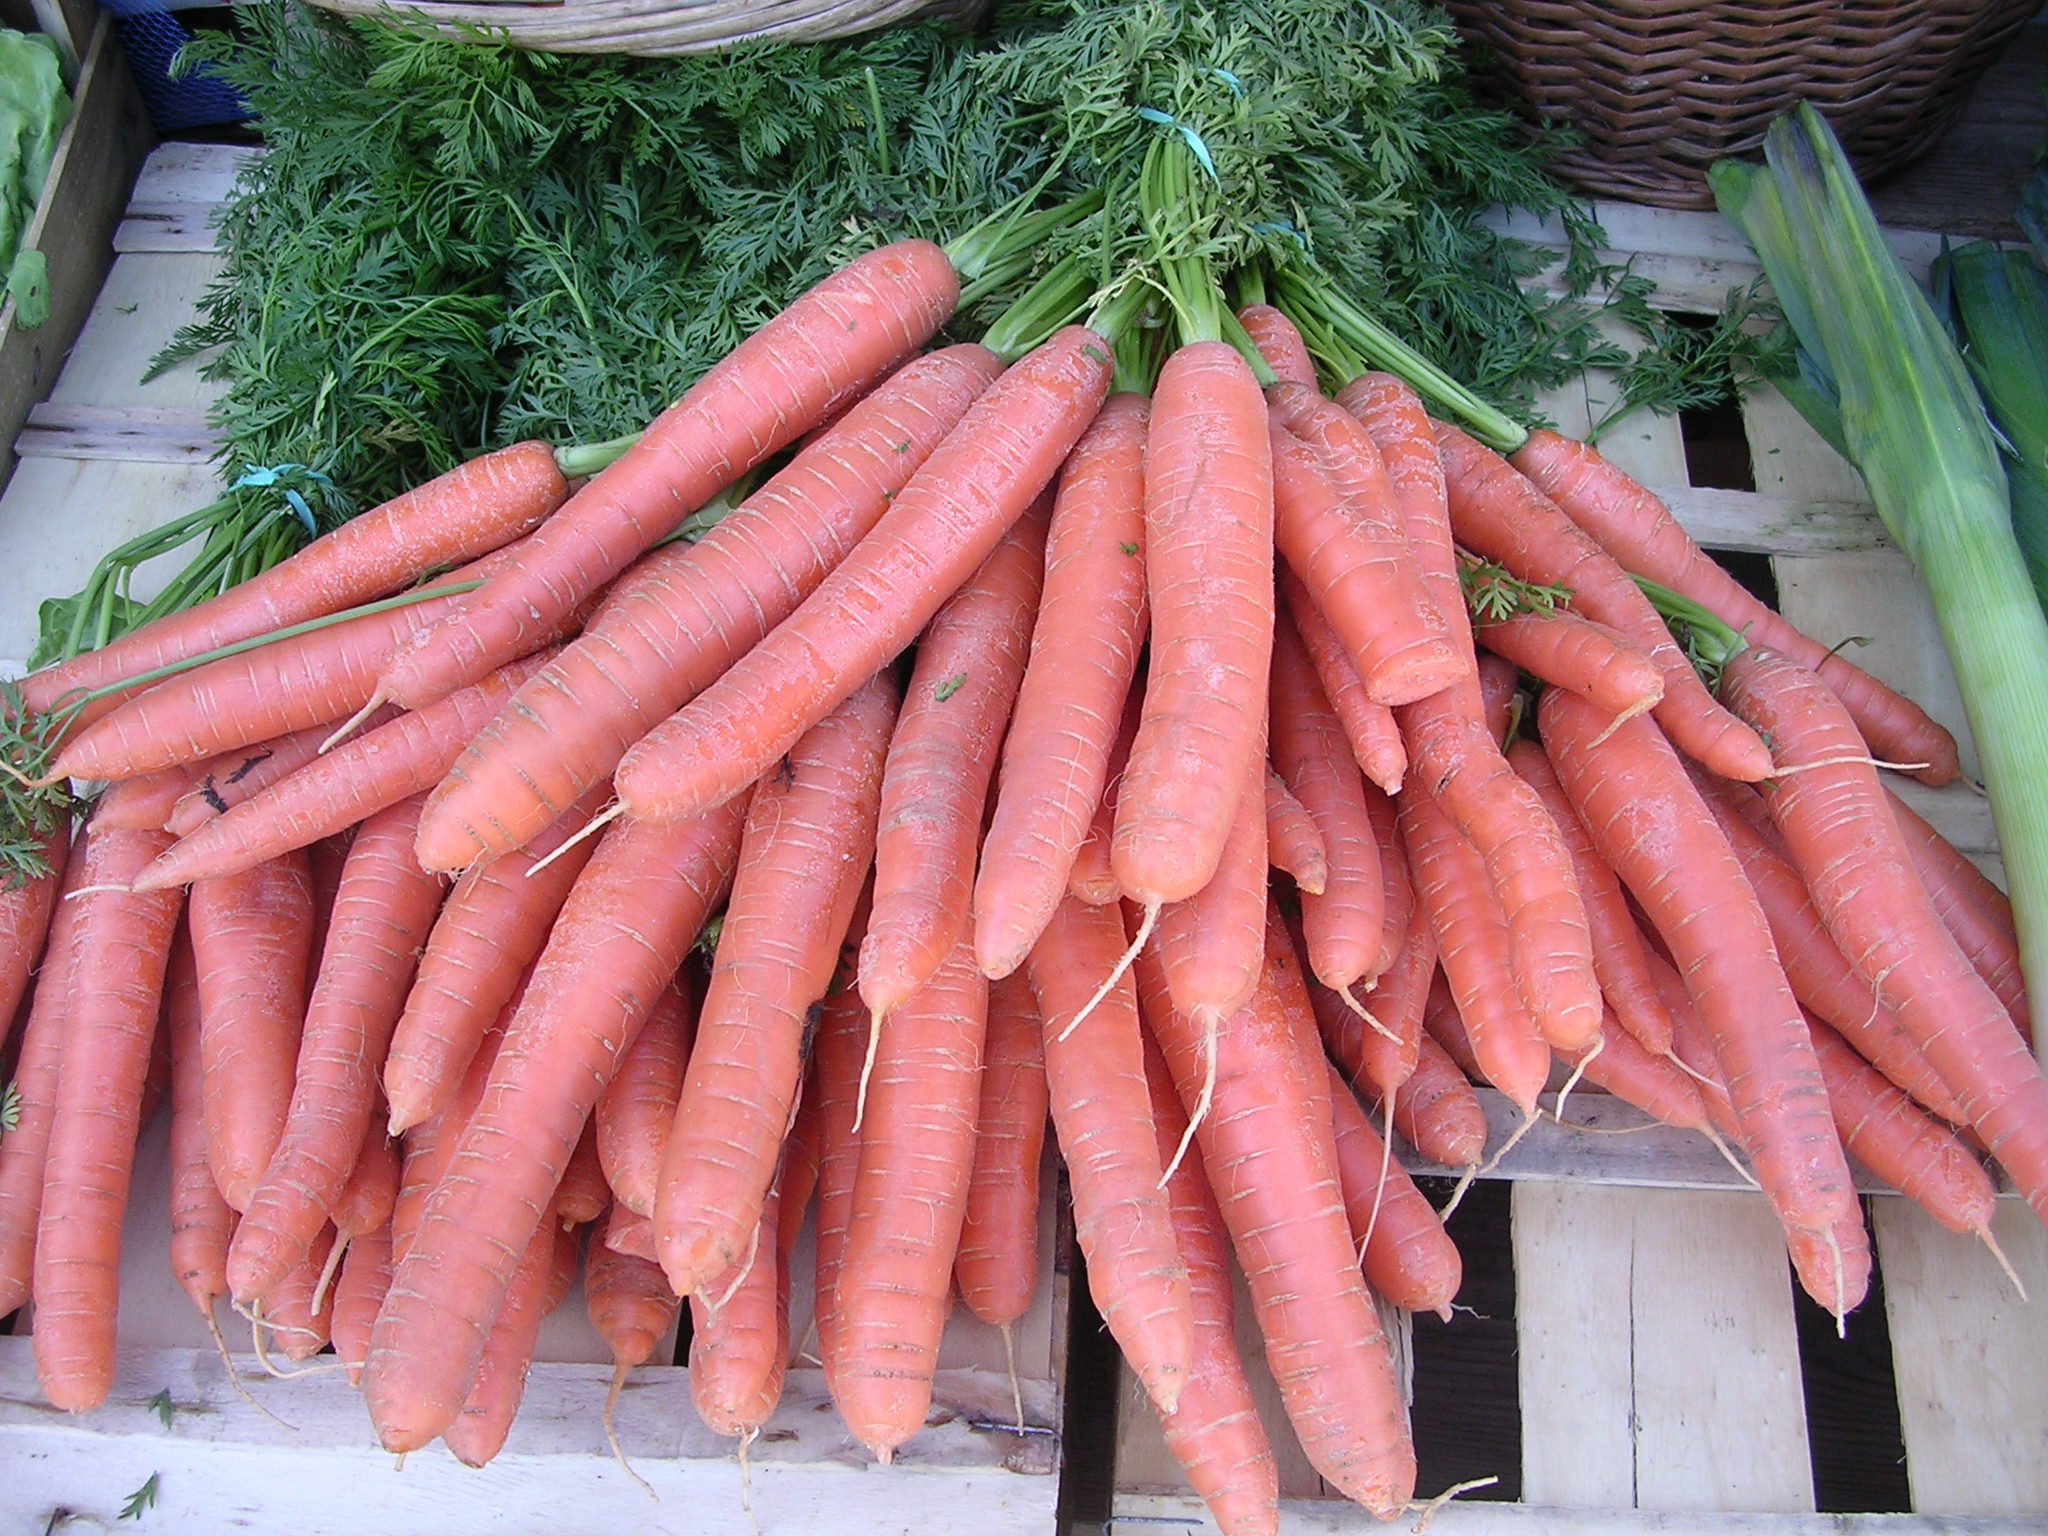
Figure 6. Harvested Danvers carrots.
Turnips
Turnips grow well in both spring and fall, but as with most cool-season vegetables, a fall harvest is preferred. Like beets, turnips can also be used for greens. Turnips differ from rutabagas in that turnip leaves are hairy, and the flesh of the root is white, while rutabagas have large, smooth leaves and roots with yellow flesh. The turnip is also a relatively short-season crop, while rutabagas will take the entire growing season to mature.
Parsnips
Parsnips require a relatively long growing season, and their growth is similar to that of carrots. Roots overwinter well in the soil, particularly when covered with a straw mulch. The taste and quality of the flesh is actually enhanced after several mild freezes.
Solanaceous Crops
The Solanaceae family contains a number of economically important vegetables, including potatoes, tomatoes, peppers, and eggplant. It also contains other crops like tobacco. The foliage of many of these crops contains highly toxic alkaloids, such as tomatine in tomatoes and solanine in potatoes. Potato tubers can turn green and become toxic if exposed to sufficient light (Figure 7).

Figure 7. Potato plant with tubers, including one that has turned green due to sun exposure.
Potatoes
Potatoes are occasionally listed as root crops, but the tubers are actually short, thickened, underground stems. Plant certified seed potatoes from a nursery or seed catalog. Potatoes from a grocery store are often treated with a sprout inhibitor and are more prone to disease.
Plant potatoes by cutting tubers into sections averaging 1 1/2-2 in., each containing at least one good eye or bud. Treat potato pieces with a fungicide to reduce chances of rot. When cutting tubers for planting, let the sections dry out in the shade for a day or two so that the cut surfaces of the sections or “seed pieces” develop cork or scar tissue. This reduces the chances of tuber rot after planting.
Plant potatoes in a trench 6-8 in. deep, spacing the seed pieces 12 in. apart. The soil beneath the trench should be well-conditioned with compost. Cover seed pieces with 1-2 in. of soil and compost, then irrigate. As foliage develops and plants reach 5-6 in. tall, backfill the trench with a mixture of soil and compost throughout the first part of the summer, hilling up the soil around the developing foliage. Keep at least three-quarters of the foliage above the soil line. Tubers form on many stems rising above the seed piece, and they must be kept cool; mulching the bed with straw keeps tubers cool. Seed pieces placed too close to the soil surface during hot weather form too much foliage and no tubers. Over-stimulation with nitrogen fertilizer can cause the same problem.
Potatoes can be harvested as new potatoes when the tubers reach a desired size. Skin on new potatoes slips easily from the tubers. Use new potatoes immediately because they have a short storage life.
As potato plants mature, growth slows, and tops turn yellow and begin to fall over. Skin on the tubers becomes thicker, tougher, and more firmly attached. Dig potatoes carefully with a spading fork or shovel.
Store mature potatoes at 60°F for two weeks, then lower storage temperatures of 38-40°F. Do not let temperatures drop below this point, or sugars will accumulate in the tubers, reducing their cooking quality and giving them a sweet flavor.
Tomatoes
Tomatoes are the most popular crop planted in New Mexico home gardens, as well as across the United States (Figure 8). Tomatoes are easy to grow, but New Mexicans must make careful variety selections for their area. Tomato varieties come in various sizes, shapes, colors, and growth habits. Try growing several different varieties in your home garden.

Figure 8. Mature green, pink, and fully ripe tomato fruit.
Tomatoes are a warm-season crop and are sensitive to frosts. For early production, try raising plants to transplant into the garden, or buy transplants from local nurseries. Transplanting is recommended for the higher elevations of New Mexico, where the growing season is short. To grow your own transplants, start them at least 8-10 weeks before planting them in the garden. Transplants can be grown indoors or outdoors; see NMSU Cooperative Extension Guide H-220, Starting Plants Early Outdoors (https://pubs.nmsu.edu/_h/H220/index.html), for more information on growing transplants outdoors.
In central and southern New Mexico, tomatoes can be direct-seeded. Plants may produce late, but they are generally hardier and more vigorous than transplants. Plant seed 1/2 in. deep in hills spaced 3 ft. apart, or plant them in straight rows on the side of the irrigation bed. Thin tomatoes to one plant every 18-30 in. Leave the most vigorous plants behind when thinning.
In home gardens where space is a problem, many gardeners stake, cage, or trellis their tomatoes. Training tomatoes to stakes or cages keeps the fruit off the ground, reducing the amount of fruit rot that occurs on untrained tomato vines. Tomatoes that are staked and pruned usually produce fruit earlier; however, blossom-end rot and sunscald are more prevalent. Another disadvantage is that stake and cage systems require extra work and materials.
One-Stem Staking Method. Drive an 8-ft, 2-in. by 2-in. stake at the base of the plant. As the tomato plant grows, pinch out any side branches that form in the leaf axils, allowing only the terminal branches to grow. Tie the plant to the 2-by-2 pole with soft cloth strips, string, plastic tape, or plastic-coated wire ties. Tie the plant loosely to avoid girdling the stem.
Two-Stem (or More) Staking Method. While the plant is growing, allow more than one stem to develop, then remove any unwanted suckers, leaving only the terminal branches to grow. Use wooden stakes or a trellis, or use an overhead wire from which string or twine is tied loosely around the base of the plant. Tie two or three strings per plant, depending on how many branches you want. As the main terminals grow, untie the string from the suspended wire, wrap it around the stem for support, and retie it once again to the suspended wire.
Wire Cages. The major advantage of cages is that the unpruned vine provides foliage cover to protect tomatoes from sunscald or sunburn. By using cages, you avoid the tedious chores of tying and pruning. Gardeners can purchase several types of cages or make cages using concrete-reinforcing wire or hog wire. Cage size may vary, but a cylinder 24 in. in diameter and 60 in. high is most common. Make sure the wire mesh is large enough so that you can reach in and harvest the fruit.
Not all tomato varieties adapt to staking and caging. Tomato growth habits are “determinate” or “indeterminate.” A tomato with a determinate growth habit stops growing at a certain height because the main stem develops a flower bud and fruit at the top. Most determinate varieties are bushy, short, early bearing types, and most of the fruit matures at the same time. Determinate tomatoes are best left unstaked.
Indeterminate tomatoes grow and produce continuously throughout the growing season and do not terminate in a flower bud or fruit. Indeterminate plants are well adapted to staking.
Tomatoes perform best with an even supply of water throughout the season. Water tomatoes deeply to encourage deep root growth, soaking the soil at least 8 in. deep each time it is watered.
If tomatoes dry out or if they are watered unevenly, many diseases may appear. Blossom-end rot is a physiological disease that appears as a leathery, sunken scar on the blossom end of the fruit. Mulching often helps reduce the disease by keeping a more even water supply available to the plants.
Tomatoes do not set fruit well when night temperatures are below 55°F or when daytime temperatures exceed 95°F. When night temperatures are cool, it takes a long time for the pollen to germinate. The pistil, or female part of the flower, may have passed its receptive stage for fertilization, and blossoms may fall off. Earlier-maturing varieties generally have better fruit set at lower temperatures, so experiment with different varieties. Additionally, hormones sold in nurseries and garden centers can be sprayed on the blossoms to help keep the female part of the flower receptive for a longer time. “Heat-tolerant” varieties can be used in warmer areas of the state.
To ensure a good fruit set, many gardeners vibrate or shake plants at midday when temperatures are warm to scatter pollen for good pollination. Use a battery-powered toothbrush to gently shake each flower cluster, or if the tomatoes are staked or caged, hit the structure with a board or stick to scatter the pollen onto the receptive female portions of the flowers.
Buy or plant tomatoes that are disease-resistant. Check with nursery staff where you buy your plants, or check the seed label for the letters V, F, N, T, or A following the variety name.
“V” denotes resistance to Verticillium wilt, a soil-borne fungal disease for which there is no cure. Symptoms of Verticillium wilt first appear on the plant’s older leaves, which turn yellow and dry up (often without wilting) and drop prematurely. The plant seldom dies, but leaf loss will cause tomatoes to sunburn on the plant.
“F” means the plant has resistance to Fusarium wilt, another soil-borne fungal disease, of which there are two strains: races 1 and 2. Two Fs on the label indicate resistance to both races. Fusarium wilt is characterized by leaf yellowing that progresses upward from the base of the plant. Leaves wilt noticeably before the plant dies.
“N” denotes resistance to nematodes, which are microscopic roundworms. The most important, root knot nematode, causes plants to form swellings or knots on the roots. Affected plants are generally stunted and may wilt in hot weather. Nematodes can be introduced by transplants set in the garden, then become persistent in the soil. Nematodes also occur naturally in some soils.
“T” refers to resistance to tobacco mosaic virus, which affects tomatoes, eggplant, chile, and other related plants. Symptoms on tomatoes include light- and dark-green mottled foliage, with curling and slight malformation. The disease is easily spread, especially by people who smoke and handle plants without first washing their hands with soap and water. Merely brushing infected plants with clothing can spread the disease.
“A” refers to Alternaria resistance. Alternaria is a fungal disease of tomatoes often called early blight, Alternaria stem canker, or black mold.
Many tomato varieties are resistant to three of the major diseases: Verticillium wilt (V), Fusarium wilt (F), and nematodes (N). Researchers continue to develop better disease-resistant varieties.
Beet curly top is a major virus disease of tomatoes in New Mexico and is spread by the beet leafhopper. Infected plants become stunted, with stiff, curled leaves. Covering the plants early in the season with a row cover helps to prevent beet leafhoppers from infecting the plants and will help to reduce the incidence of this disease.
Chile Peppers
Peppers (Capsicum spp.) exhibit a wide variety of shapes, sizes, colors, and tastes. The term “pepper” should not be confused with “black pepper” (Piper nigrum), which is produced from the dried, unripe fruit of a vine native to India and grown in tropical areas. Peppers can generally be classified into two groups: mild- or sweet-tasting fruit (bell, pimento, sweet wax types) and fruit with hot or pungent flesh (New Mexico-type long green and jalapeño types). In New Mexico, the latter are referred to as “chile”.
Direct seed peppers at about the average date of the last killing frost or transplant them into the garden after the risk of frost has passed. There are several methods of direct seeding peppers. Many New Mexicans use the hill method, placing several seeds in hills spaced about 12 in. apart in a row. When seedlings appear, thin all but two or three of the stronger plants. Rather than thinning completely, allow some plants to continue developing for later transplanting to bare places where no seedlings sprouted.
As an alternative to the hill method, gardeners may choose to sow seeds in rows. Sow seeds about 1 in. apart in a straight row near the edge of the furrow. When the plants develop four or more true leaves, thin to one plant every 12 in. To get a head start on pepper production, many gardeners raise or buy transplants to set in the garden after danger of frost.
Provide peppers with an even moisture supply, but take care not to overwater. Chile wilt (Phytophthora root rot) can be a major problem under wet conditions. On the other hand, insufficient water may lead to blossom-end rot.
Eggplant
Eggplant has growth characteristics similar to peppers. Lavender flowers are borne singly or in clusters like a tomato. Depending on the variety, fruit may vary in shape from oval to oblong, with colors ranging from purplish-black to white. This plant is very sensitive to cold.
Legumes
Legumes, in symbiosis with compatible rhizobia bacteria, have the capacity to produce their own nitrogen from elemental nitrogen in the atmosphere. Thus, little if any additional nitrogen fertilizer is needed for the production of these crops. Rhizobia are bacteria found in nodules on the roots of legumes that “fix” atmospheric nitrogen into a form used by plants. Crops planted after legumes will also benefit from the nitrogen left in the soil by these plants. In soils where legumes have never been grown, the seed of the legume may have to be treated (inoculated) initially with the appropriate rhizobia bacteria to begin the process. These bacteria are generally available through local nurseries or seed catalogs.
Green beans
Green beans or snap beans are classified as either bush or pole types. Bush-type (determinate) beans—as the name indicates—grow into small, compact plants. Pole (indeterminate) beans have a climbing or twining characteristic and require a trellis, fence, or other structure on which to climb. Pole beans are planted in the spring and will produce more beans over a longer time than bush beans. In warmer growing areas, however, bush beans can be planted in the spring for a summer crop or planted in the summer for a fall crop, thus making them an excellent crop for rotations with cool-season crops like radishes or leaf lettuce.
Bush beans are normally planted in rows, often on both sides of a raised vegetable bed. Pole beans can be planted in hills and allowed to grow up stakes formed in a tepee shape, or along a fence (4-8 in. apart).
Lima/butter beans
Lima beans or butter beans are also available as either bush or pole types. Lima beans, however, require a longer time to mature. Varieties may vary from the large-seeded ‘Fordhook’ types to the smaller-seeded baby lima. Beans can be eaten in either the mature green stage or as dry beans.
Dry Beans
Try your luck at raising beans for drying (Figure 9). Dry beans are among the oldest of foods. Prehistoric people found that dry beans stored well and were easy to transport and prepare. Dry beans are popular because they are inexpensive and highly nutritious.
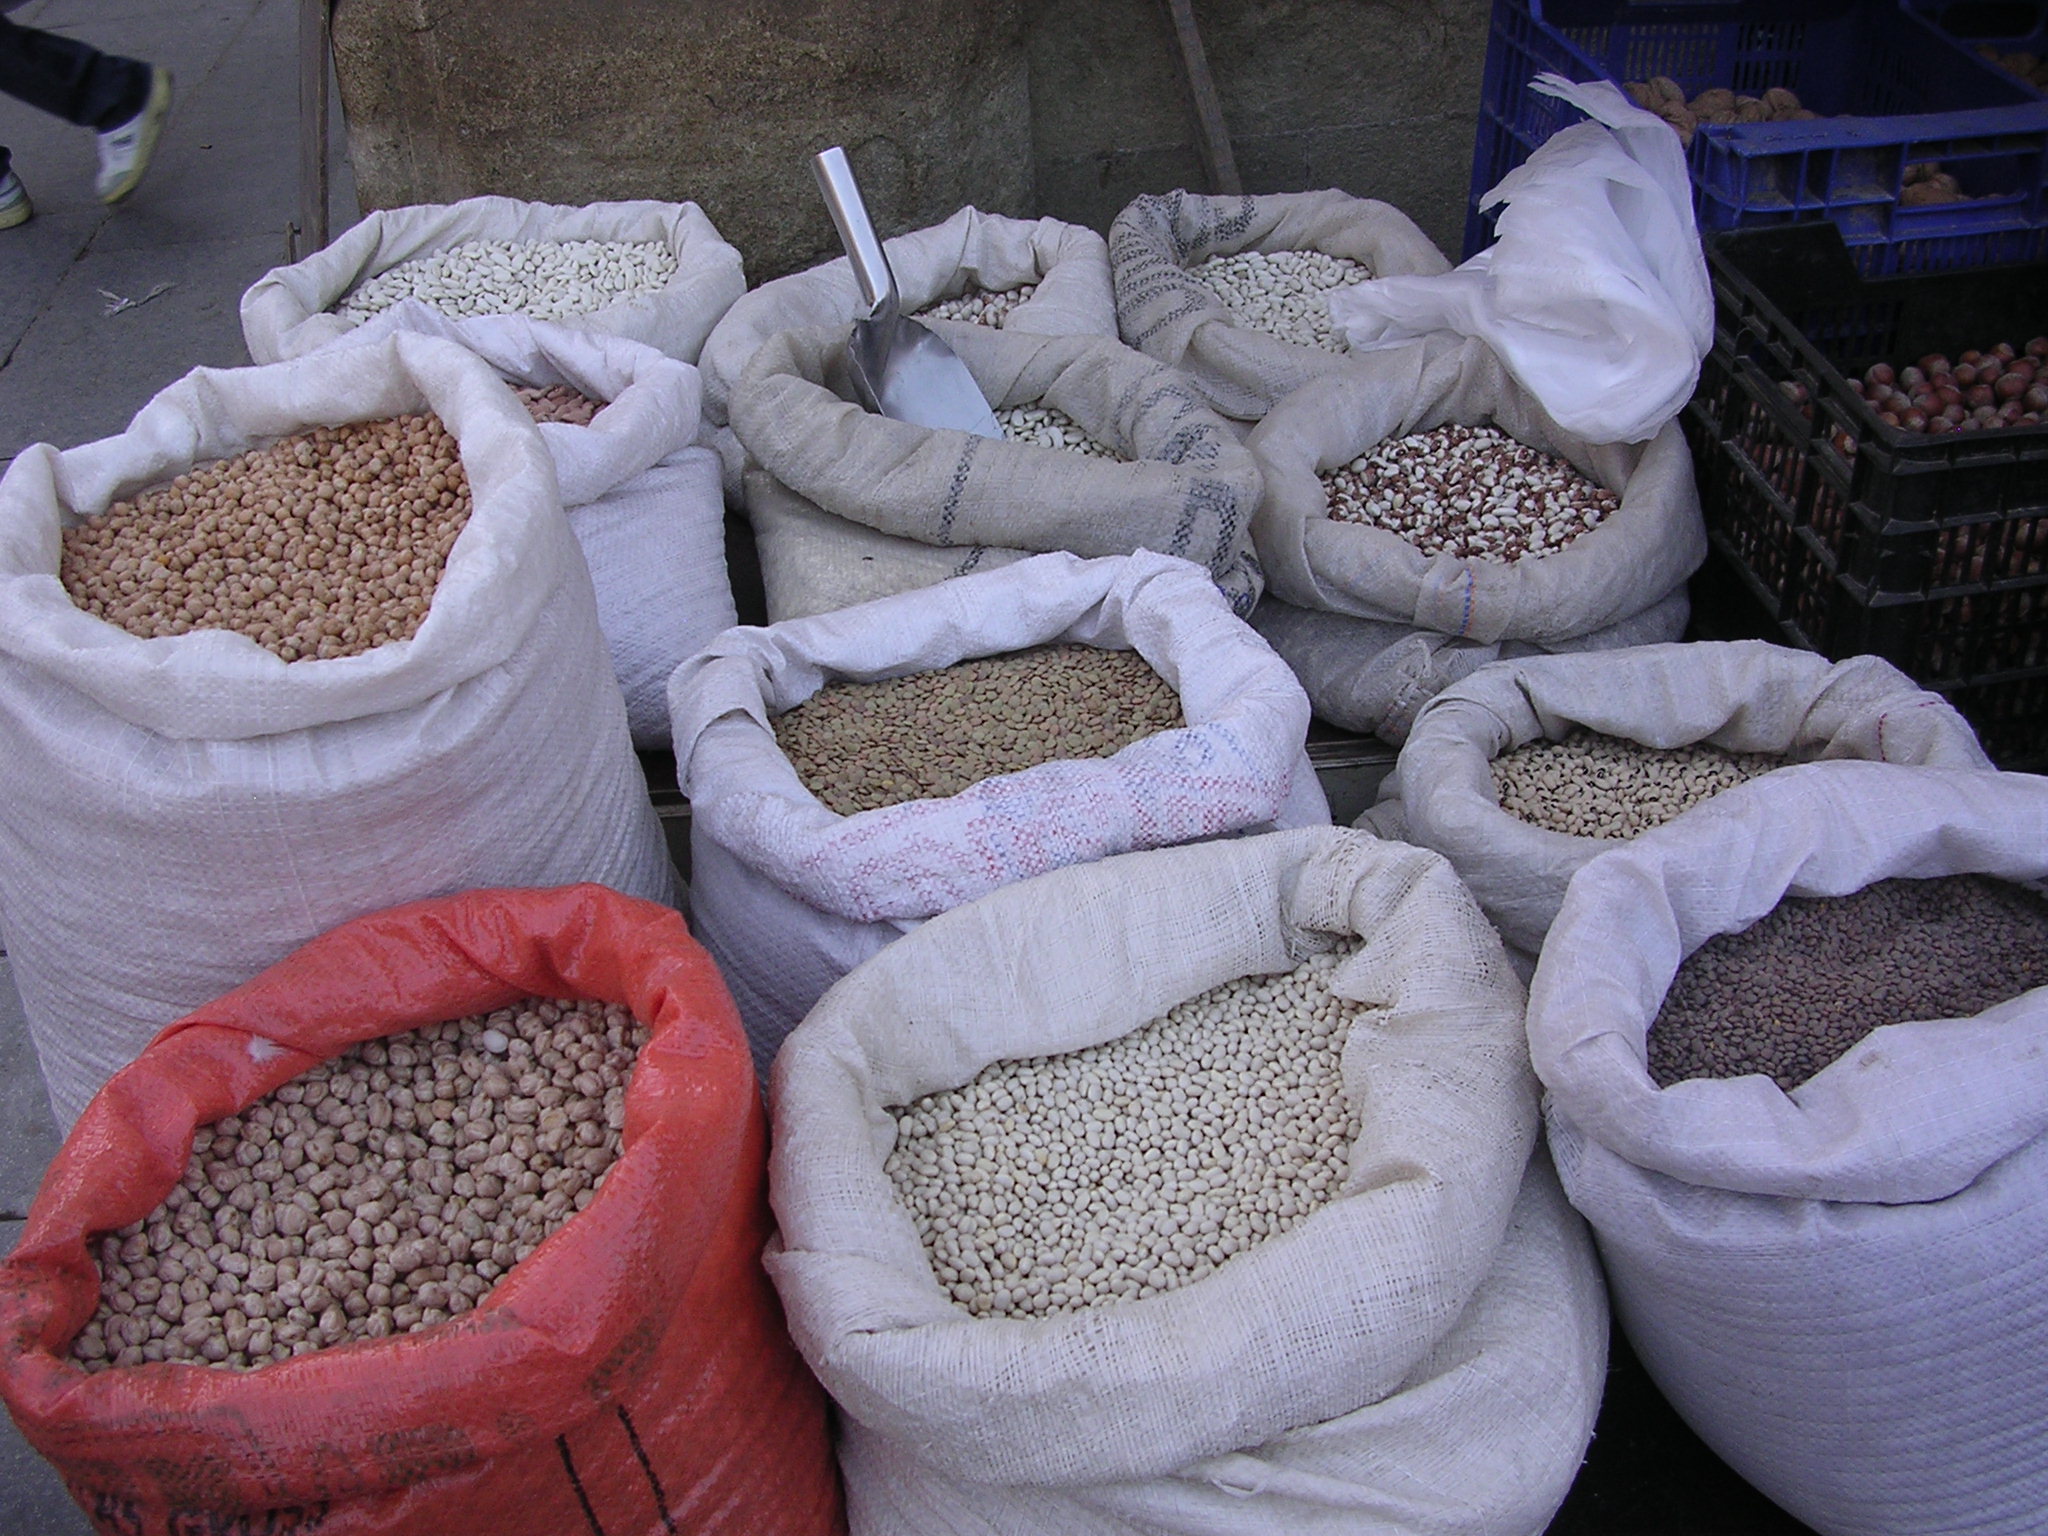
Figure 9. Assorted varieties of dry beans.
Pinto beans
Pinto beans are a New Mexico favorite. Plant pinto beans in the spring, and plant again in mid-July for a second crop. Harvest pinto beans before the dry pods shatter. Pick individual pods or cut the entire plant just before the bottom pods shatter. Dry and trash cut plants and store the beans for later use.
Aztec beans
The Aztec bean has become popular in northern New Mexico home gardens. This large, white bean variety has been found in ancient Native American ruins. The Aztec bean is a vigorous climber and can easily climb 8-ft poles. Each plant can produce more than 1/2 lb of dry beans in ideal growing conditions. Soak the beans overnight before cooking; they will increase to four times their original size. Each cooked bean is bite-sized.
Other Beans
Consider other beans for the home garden.
Soybeans, fava beans, and black-eyed peas
Mature, dry soybeans are excellent for winter use and for sprouting. Fava beans (broad beans) are not true beans but are related to vetch. Green fava beans are used as green shell beans, much like lima beans. Some people of Mediterranean descent have a genetic trait that causes a severe allergic reaction to fava beans. Fava beans prefer cool temperatures. Plant them at the same time as garden peas. Black-eyed peas are used in New Mexico as snap or dry peas. Although it has many names, this vegetable is neither a bean nor a pea, but a cowpea. Like beans, black-eyed peas require warm days and warm nights to develop properly.
Peas
Garden peas are cool-weather crops. In New Mexico, peas do not do well once warm weather arrives, so plant them in the spring as soon as the soil can be worked. Garden peas are often classified into two types: the traditional English pea, which must be shelled, and edible-podded peas, where both the peas and pods are eaten.
Pods of the English pea should be picked when plump, usually beginning on the bottom of the plant. Pick pods often so the plants will remain productive. Do not allow peas to become too mature, or they will lose their sweetness. Harvest early in the morning when it’s cool and use the peas as soon as possible to retain sweetness.
Edible-podded peas are often classified into two groups. “Stir-fry” types are often called sugar peas, snow peas, or China peas. Harvest when these pods are young, before the peas begin to form in the pod (flat). The other group is called snap peas. Pods are allowed to become relatively thick and fleshy. Harvest before they lose their sweetness and become too fibrous. Snap peas can be eaten raw in salads, served raw with dips or relish trays, or cooked like green beans.
Cucurbits
Cucurbits are warm-season crops characterized by spreading vines and fleshy fruit with relatively hard rinds. These vine crops can be used in many ways, from salads to desserts to cooked vegetables to snack foods.
Cucumbers
Cucumbers are often planted on beds 36-72 in. apart to accommodate their spreading vines. Vines can also be trained up a fence or trellis for support. Fruit will be cleaner and have fewer rot problems if they are trellised. Some long, slender cucumbers tend to grow crooked, but cucumbers hanging from a support are usually straighter. When space is limited, home gardeners may want to try bush varieties, which are also good for pot culture and mini-gardens.
There are several types of cucumbers. Sliced cucumbers are usually used fresh, either alone or in salads. These long, cylindrical fruits are best when 6-8 in. long. If they are picked smaller than 6 in., slicing cucumbers can also be pickled. There are, however, some varieties specifically bred for pickling.
The lemon cucumber is popular in New Mexico gardens. This variety is the size and shape of a lemon and turns a lemon color when mature. This easy-to-grow, burpless cucumber has a flavor unlike most other cucumbers.
The Armenian cucumber has gained popularity in the past few years (Figure 10). The fruit grows 12-18 in. long and is about 2-3 in. wide. The skin is spineless with slight ridges and is greenish-yellow in color. When allowed to grow too large before harvesting, Armenian cucumbers tend to be seedy. The Armenian cucumber has a mild flavor that many people enjoy.

Figure 10. Armenian cucumber.
Squash
Squash is a favorite in New Mexico gardens. It is easy to grow, nutritious, and low in calories. Squash can be eaten raw, fried, boiled, steamed, baked, and even made into delicious pies.
Squash has been around for a long time. Archaeologists have discovered stems, seeds, and rinds in ancient cliff dwellings in the Southwest, indicating that squash was grown as early as 1,500-2,000 B.C.
Squash falls into four main species of the genus Cucurbita: C. pepo, C. moschata, C. maxima, and C. argyrosperma. Within these species are vegetables often commonly called pumpkins; therefore, the squash and pumpkin have no biological difference.
For the home gardener, however, squash are usually classified as summer or winter squash. Summer squash includes varieties customarily eaten at an immature stage when the seeds are not fully developed and the rind is still tender. Types such as the zucchini, scalloped, and yellow crookneck or yellow straightneck are good summer squash.
Harvest winter squash when they are fully mature after the rind has hardened (Figure 11). Under proper conditions, these squashes can be stored for several months for winter use. Pumpkins should be fully colored (usually orange).

Figure 11. Assorted varieties of winter squash fruit.
Spaghetti squash is often listed in seed catalogues as a squash, although it is really a gourd. Its stringy, spaghetti-like strands can substitute for spaghetti, and it is an excellent addition to New Mexico gardens. Store spaghetti squash like winter squash.
It is important to provide squash with plenty of sunlight, space, rich soil, and moisture. Plant squash after danger of frost because the plants cannot tolerate freezing temperatures.
In areas where the frost-free period exceeds 150 days, gardeners can make two plantings of summer squash. Summer squash can produce edible fruits 7-8 weeks after seeding. Winter squash requires more time, taking 11-17 weeks to mature.
In general, bush types of squash can be planted in hills 24-45 in. apart in rows 36-60 in. apart. Plant four to five seeds per hill. After seedlings appear, thin to the best two or three plants. Vining types of squash require more room to grow. Space hills 36-96 in. apart in rows 72-96 in. apart.
Irrigate squash deeply. Avoid sprinkler or overhead irrigation, which encourages foliar diseases such as powdery mildew. It is normal for squash leaves to droop slightly on hot, dry days, but they recover by morning. If not, water the plants.
Squash is a monoecious plant, which means it bears imperfect, unisexual flowers. Both sexes of flowers grow on the same plant. Male (staminate) flowers taper into the stem, while the female flowers have a swollen ovary, or miniature squash, at their base. A common misconception is that because squash is a member of the same family as cucumbers, cantaloupes, and watermelon, these vegetables easily cross. This is not the case.
Winter squash should be well-matured before storage. Cure winter squash by storing them at 80-85°F for 10 days. This curing process hardens the rind and heals any cut surfaces. After curing, store squash in a dry location and lower temperatures to 55-60°F.
Acorn squash is treated differently from other winter squash. Harvest when the bottoms of the fruit (where they touch soil) turn yellow to orange (green types). Do not cure acorn squash. Store them at 45-50°F. High temperatures cause acorn squash to lose moisture and become stringy.
Melons
Cantaloupe and muskmelon are practically synonymous; muskmelon is the term used in the Northeast, while cantaloupe is commonly used in other parts of the country. Cantaloupes grow best and develop the best flavor in hot, dry climates, making New Mexico an ideal place for them.
Cantaloupes perform best in moderately sandy soil. Plant by direct seeding after danger of frost. Sow 3-6 seeds in hills 4-6 ft apart. Thin to the best two to four seedlings. Seed can also be planted 1/2-3/4 in. deep, 12 in. apart in rows 60-84 in. wide.
When ripe, cantaloupes usually have a rough netting on the rind and an orange-colored flesh with a distinct aroma. As the melon matures, the color under the netting turns yellow, and a crack develops around the stem where it is attached to the fruit. When mature, the stem breaks away from the melon with little to slight pressure. This stage is called the “full-slip stage,” and cantaloupes have their best flavor at this time.
The honeydew melon has a smooth, ivory rind and thick, light-green flesh. Honeydew is sweet but lacks the characteristic flavor of cantaloupe. Fruits can weigh 6 lbs or more.
The casaba is a melon with a truly distinct flavor. When mature, the outside rind turns bright golden yellow and wrinkled. Its flesh is thick and white, and the melon has a musky flavor. If stored in a cool, dry place, casaba keeps well for a month or more after harvest. It is a favorite of many native New Mexicans.
The crenshaw melon usually has salmon-pink flesh. Melons are large and oval, and pointed at the stem end. They can weigh up to 14 lbs.
Watermelons are also members of the cucurbit family (Figure 12). Because they require a long growing season, choose an early maturing variety in areas with shorter growing seasons. Watermelons require more room to spread than cantaloupes—at least 8-10 ft.

Figure 12. Watermelon fruit almost ready for harvest.
It is difficult to determine when a watermelon has reached maturity and is ready for harvest. Some gardeners look at the tendril closest to the melon. When the tendril turns brown and dries, it is an indication of maturity. This indication, however, is not always accurate because the tendril often dries up 7-10 days before the melon is fully mature, or the tendril may have had insect or mechanical damage that caused it to dry up.
Some gardeners use sound as a guide. When thumped, a green watermelon gives a ringing sound; when ripe, it gives a dull sound. This technique takes practice.
Perhaps the surest sign of maturity is the appearance of the bottom surface where the melon has rested in the field. As the watermelon matures, the ground spot turns a rich banana yellow color.
Corn
Sweet corn is very popular among backyard gardeners because of the unbeatable fresh taste of homegrown corn. The roasting ear stage does not last long, so successive planting or planting different varieties that mature at different times is recommended for continuous harvest.
Corn is wind-pollinated. Pollen from the tassels of one plant fertilizes the silk from another. To ensure good pollination, plant corn of the same variety in blocks of several short rows, rather than planting one or two long rows. Corn can also be planted in hills with three or four plants per hill to ensure good pollination.
Pollen from various types and varieties of corn can contaminate sweet corn, causing kernels to become starchy and lose their sweetness. This is especially true of some newer, extra-sweet varieties. Separate sweet corn varieties to ensure top quality and flavor.
Plant sweet corn in the garden after soil warms in the spring. Plant corn 1-2 in. deep, 3-4 in. apart. Thin plants to single stalks 8-12 in. apart. Extra-sweet or super-sweet varieties of sweet corn should be planted 1/2-1 in. deep and two weeks later than regular sweet corn for good germination.
Harvest sweet corn when kernels are in the milk dough stage. At this stage, silks are brown and dry. Kernels are fully expanded, but are tender and filled with an opaque, milky juice.
Regular sweet corn passes through its prime rapidly. If harvest is delayed, kernels become tough and starchy and lose their sweet flavor. Sweet corn also loses quality rapidly after it is picked. The sooner the corn is prepared after picking, the better the flavor. For improved sweetness, plant extra- or super-sweet varieties.
Popcorn is handled the same way as sweet corn. Many varieties do well in New Mexico. Some varieties have yellow kernels, while others have white kernels. Strawberry popcorn has small, mahogany red ears that resemble large strawberries. Choose a hull-less variety that produces more than one ear per stalk. Harvest popcorn ears when stalks and leaves are completely dry. After removing ears, cure them for about three weeks in a dry, well-ventilated area. Ears are ready to shell when kernels come off completely dry. Store shelled kernels in tightly sealed containers.
Okra
Okra is a tropical crop, but it can be grown successfully in most warm-season areas of the state where the average temperature is 65-95°F. Varieties range from tall to dwarf, with smooth or ridged pods (Figure 13). Related to cotton, it is susceptible to most cotton diseases like Verticillium and Fusarium wilts. Only one flower per day will open on any given stem, forming fruit that is green to creamy white in color. Harvest pods when they are relatively small (3-4 in. long) and tender.

Figure 13. Carmine splendor okra plant, a red podded variety.
For further reading
CR-457B: Growing Zones, Recommended Crop Varieties, and Planting and Harvesting Information for Home Vegetable Gardens in New Mexico
pubs.nmsu.edu/_circulars/CR457B/
H-220: Starting Plants Early Outdoors
pubs.nmsu.edu/_h/H220/
H-221: Spices and Herbs for the Home Garden
pubs.nmsu.edu/_h/H221/
H-240: Growing Chile Peppers in New Mexico Gardens
https://pubs.nmsu.edu/_h/H240/
Original author: Ricardo Gomez, Extension Horticulturist. Subsequently revised by James R. Sais, Extension Horticulturist; and George W. Dickersion, Extension Horticulture Specialist.

Stephanie Walker is Extension Vegetable Specialist, and has extensive experience in the food processing industry. Her primary research interests include genetics and breeding of chile peppers, vegetable mechanization, enhancing pigment content, post-harvest quality, and irrigation efficiency. She works to help commercial vegetable growers enhance the sustainability and profitability of their operations through collaboration, experimentation, and information sharing.
To find more resources for your business, home, or family, visit the College of Agricultural, Consumer and Environmental Sciences on the World Wide Web at pubs.nmsu.edu.
Contents of publications may be freely reproduced, with an appropriate citation, for educational purposes. All other rights reserved. For permission to use publications for other purposes, contact pubs@nmsu.edu or the authors listed on the publication.
New Mexico State University is an equal opportunity/affirmative action employer and educator. NMSU and the U.S. Department of Agriculture cooperating.
Revised November 2025 Las Cruces, NM