Guide C-219
Revised by Insook Ahn
College of Agricultural, Consumer and Environmental Sciences, New Mexico State University
Assistant Professor, Department of Family and Consumer Sciences New Mexico State University. (Print Friendly PDF)
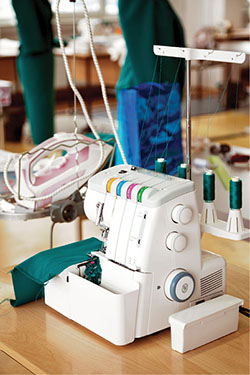
Sewing with an overlock machine is a bit different from sewing with a conventional sewing machine. Some of the sewing techniques used will require practice to become proficient. Here are a few tips to help you:

© Elena Guliaeva | Dreamstime.com
- When sewing with an overlock machine, be sure to fit the garment before it is stitched. Because seams are trimmed as they are sewn, it isn’t possible to let out seams if the garment is too snug.
- Check your machine’s use and care manual for instructions about how to adjust the thread tension. To get the feel of good stitches, try using a different color thread in each looper and needle. Adjust each tension dial as needed to achieve a balanced stitch. Stitch through a variety of fabrics to determine how fabric weight affects the stitch quality.
- When the stitch is properly adjusted, the upper looper thread will be smooth against the right side of the fabric and the lower looper will be smooth against the wrong side of the fabric. These threads will meet and interlock evenly along the edge of the fabric. The needle thread will be seen as a long straight stitch on the right side and a shorter straight stitch, which is more widely spaced, on the wrong side (Figure 1).

Figure 1. A properly tensioned overlock stitch.
If needle thread is too loose, increase the needle tension and/or decrease either or both looper tensions (Figure 2). If upper looper thread is too loose, tighten the upper looper tension and/or loosen the lower looper (Figure 3). If the lower looper thread is too loose, tighten the lower looper tension and/or loosen the upper looper tension (Figure 4).

Figure 2. An unbalanced stitch where the needle thread is too loose.

Figure 3. An unbalanced stitch where the upper looper thread is too loose.

Figure 4. An unbalanced stitch where the lower looper thread is too loose.
- The stitch width of an overlock machine is determined by two or three factors. On some machines the stitch finger or the cutting knife can be moved by turning a dial or loosening a screw. Or, change the throat plate to one that has a wider or narrower stitch finger.
If the overlock uses two needles, the stitch width can be adjusted by removing one of the needles. This can be done only when a three–thread stitch is used.
The stitch length of an overlock machine may vary from 0 to 5 mm (0–0.2 inch). The stitch can be adjusted by turning a dial, moving a lever, or loosening a screw.
When sewing medium-weight fabric, use an average stitch length, or 3 mm (about 9 stitches per inch). Delicate fabrics or fabrics that ravel should be stitched with a shorter stitch, or 2 mm (about 12 stitches per inch). A 1-mm (0.04-inch) setting will produce a satin stitch and is used for rolled hems.
- If your machine does not have a seam allowance guide, use masking tape to indicate the seam widths desired. Be sure to measure from the stitching on the seamline, not from the cut edge of the seam.
- At the beginning of a seam, it is not always necessary to raise and lower the presser foot. At the end of the seam, continue running the machine until the thread chain is long enough to bring under the knife blade to be cut.
- When seaming many sections of a project, stitch from one piece to the next without raising the presser foot or cutting the threads.
- To secure seam ends, try one of the following methods:
- Thread the chain end into a large-eyed needle and slip the needle under the seam’s stitching until the chain end is buried inside the seam (Figure 5).

Figure 5. A seam end can be secured by burying it inside the seam.
- Stitch a few stitches, then fold the loose thread chain so you stitch over it. At the end of the seam, stitch off the fabric about 1/2 inch (13 mm), raise the presser foot, and turn the fabric over. Place the fabric back under the presser foot, lower the foot, and stitch about 1 inch (25 mm) before stitching off the fabric (Figure 6).

Figure 6. A seam end can be secured by stitching over it.
- Use a seam fixative to glue the thread ends at the end of each seam. This is especially useful when seams are crossed by other stitching (Figure 7).

Figure 7. A seam end can be secured with seam fixative glue.
- Tie a knot in the thread chain close to the fabric edge.
- Seams should be pressed directionally over the stitching to smooth them, then pressed in the correct position. To avoid an impression of seam allowances on the right side of the garment, a piece of paper can be placed under the seams as they are pressed.
Because seam allowances of overlocked seams are finished together, they must be pressed to one side. Horizontal seams are usually pressed up and shoulder seams are pressed toward the back. Vertical seams are usually pressed toward the center front or back. The seam of the sleeve cap should be pressed toward the sleeve.
To avoid bulkiness, seams in hem allowances should be turned in the opposite direction. When seams incorporate fullness, they appear less bulky when they are pressed toward the smoother side of the seam.
- It’s best to avoid stitching errors when using an overlock machine because once the seam edges are trimmed off, there’s little you can do to remedy the situation. If you do have to rip out seams, here is how to do it:
- Two-thread overlock: Use scissors or a ripper to cut stitch loops along fabric edge. Pull out cut threads.
- Three- and four-thread overlock: Use scissors or a ripper to cut stitch loops along fabric edge. Pull on needle thread to remove. Pull out all cut loop threads.
- Chainstitch: Clip the needle thread, then pull the looper thread.
Special Tips for Overlock Sewing
- Pin, glue, or hand baste seams together as you sew. Pins should be placed parallel to the edge inside the seamline. Place the pin heads so they can be removed easily as you sew. The knife blades will be damaged if they hit a pin as you sew.
Glue baste fabrics together with a water-soluble glue stick. Lightly dot glue along seamline about 2–3 inches (50–75 mm) apart. Then, stick the seam allowances together with edges matching. Glue stick is especially helpful when matching plaids and stripes.
Hand basting may be necessary on loosely woven fabrics or when edges are very biased.
- When selecting thread for the overlock, match the color of the needle thread because it is the one that may show along the seam on the right side. You can use a basic color, such as beige, white, gray, or black, on the loopers since these threads should not show.
- When changing thread, tie machine thread to new thread using an overhand knot. This will make the threading process simple. Remember to loosen tension dials to allow knots to pull through easily. Cut the needle thread before the knot gets to the eye of the needle. Remove knot and thread the needle.
- It is better to use all one type of thread when possible, all on spools or all on cones. Once a spool of thread starts to break, discard it and get another.
- To begin stitching at a specific point other than a corner, pull threads off the stitch finger and place fabric under the presser foot to begin stitching. After stitching around edges to the beginning, overlap stitching about 1/2 inch (13 mm) and then sew off the fabric edge. Secure threads with a knot by threading thread ends under stitches or use a seam fixative.
- When sewing curved seams, sew slowly. On outside curves, push the fabric into the presser foot so the edge seems to be straight. On inside curves, pull the fabric gently to straighten the edge. Be careful not to pull the fabric out of shape in the bias areas.
- To turn an outside corner, stitch one stitch past the edge and raise the needle and presser foot. Carefully pull the thread chain off the prong that forms stitches and turn the fabric to stitch the next side. Locate the fabric, lower the presser foot and the needle, and stitch. Stitch each corner in the same manner, or stitch along one side and off the fabric. Then, stitch the next side until all sides are sewn. Secure chain ends using one of the methods discussed above.
- To sew an inside corner, trim away all excess seam allowance. Stitch to the point where the knife blade reaches the exact corner and stop. Pull the fabric toward you so the corner is straightened out and finish stitching.
- Stabilize seams that need to keep their shape by stitching twill tape or seam binding into the seams. Place the tape so the needle stitches into the tape without cutting it, or place a piece of cording (crochet yarn, perle cotton, buttonhole twist) along the seamline and sew over it. Let the ends extend so they will be caught when the seam is crossed by another row of stitching.
- Seams sewn with a combination of conventional and overlock stitching can be used in a variety of fabrics and garment styles. Finish seam edges first using a two- or three-thread overlock stitch. Then, sew the seams using conventional stitching. Press the seam allowances open after they are stitched, unless otherwise instructed. (Not recommended for sheer fabrics where seam allowances may show through.)
- When finishing facing edges, sew facing seams together and press in the recommended direction, then overcast the outside edge so it is smoothly finished and the facing is the recommended width.
For Further Reading
C-205: Selecting a Pattern Size for Perfect Fit
https://pubs.nmsu.edu/_c/C205/
C-218: Selecting an Overlock Machine
https://pubs.nmsu.edu/_c/C218/
C-227: Making Perfect Pants
https://pubs.nmsu.edu/_c/C227/
Original authors: Susan Wright, Extension Clothing and Textiles Specialist. Darlene Dickson, 4-H/Youth Specialist, assisted in revision. Subsequently revised by Constance Kratzer, Family Resource Management Specialist.

Insook Ahn is an Assistant Professor in the Department of Family and Consumer Sciences at NMSU. Her area of expertise is in creative fashion design, sustainable design, functional design, and CAD. She has taught for twenty years at three different universities, and has published research showcasing creative design works.
To find more resources for your business, home, or family, visit the College of Agricultural, Consumer and Environmental Sciences on the World Wide Web at pubs.nmsu.edu.
Contents of publications may be freely reproduced, with an appropriate citation, for educational purposes. All other rights reserved. For permission to use publications for other purposes, contact pubs@nmsu.edu or the authors listed on the publication.
New Mexico State University is an equal opportunity/affirmative action employer and educator. NMSU and the U.S. Department of Agriculture cooperating.
Revised September 2019 Las Cruces, NM


