Guide E-318
Nancy Flores and Cindy Schlenker Davies
College of Agricultural, Consumer and Environmental Sciences
Authors: Respectively, Extension Food Technology Specialist, Department of Extension Family and Consumer Sciences; and County Program Director/Extension Home Economist, Bernalillo County Extension Office, New Mexico State University. (Print friendly PDF)
Introduction
This publication is intended for individuals with a basic understanding of canning procedures. For more detailed information, consult the USDA Complete Guide to Home Canning (2015), which is available online at nchfp.uga.edu/publications/publications_usda.html or through your local county Extension office (https://aces.nmsu.edu/county/).
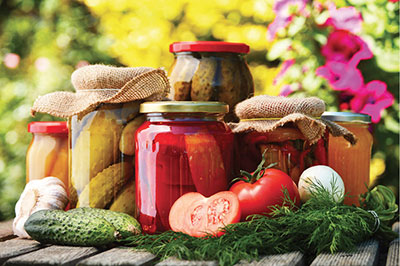
Pickled and fermented food products are classified based on their ingredients and the method of preparation. There are several general types of pickles.
© Monticelllo | Dreamstime.com
Fermented pickles, often called brine pickles, undergo a fermentation process and are cured for about 3 weeks. Dill pickles and sauerkraut are examples of this group. Changes occur in the flavor and the color of the foods, and the acidity increases as the curing process takes place.
Fresh pack or quick process pickles are brine-processed in a salt and vinegar solution for a short time period, then drained and combined with hot vinegar and seasonings in a sterilized jar that is sealed and then pasteurized. Once cooled, these can develop flavor over a 4- to 5-week period.
Refrigerator pickles are fresh-packed into sterile jars but are not cooked. Instead, they are stored in a refrigerator and used within 2 weeks.
Fruit pickles are fruits heated in a spicy syrup acidified with vinegar or lemon juice.
Relishes are chopped fruits and/or vegetables seasoned and cooked with vinegar. Relishes are often hot and spicy since they are used to accent other, sometimes bland, food.
Use Only Tested Recipes
Pickled products can be satisfactory, tasty, and safely prepared if top-quality ingredients are used, a tested recipe is followed, and the proportions or measurements of the ingredients are strictly followed. The recipes in this guide are a result of extensive research. They include the exact proportions of ingredients and the latest procedures. Always read through the complete recipe before starting. Then make sure that all necessary equipment and ingredients are on hand.
Ingredients
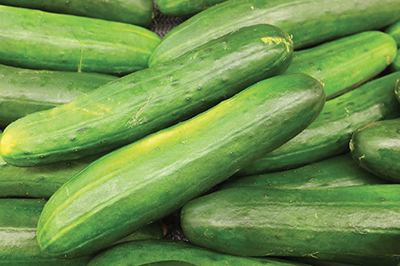
Fruits and vegetables. Select only freshly harvested, tender but firm fruits or vegetables free of any spoilage or bruises. Pickling cucumber varieties make better pickles than the slicing or salad kind. Wax-coated cucumbers should not be used to make pickles because the wax is almost impossible to remove and it prevents penetration of the brine.
Keep fruits or vegetables refrigerated or as cool as possible until ready to process to prevent deterioration. For best results, have just enough on hand to make one canner load. Process as soon as possible without interrupting the procedure.
Salt. There are various types of salt. Use pure canning or pickling salt for quality pickled products. Table salt and iodized salt contain anti-caking ingredients and may cause cloudiness or discoloration when used in pickling. Sea salt is evaporated from ocean water and contains various minerals that may cause discoloration in canned foods.
It is critical to use the proper amount of salt specified in any fermented pickle recipe since salt ensures that the fermentation bacteria or lactic acid bacteria will grow and produce the acid needed for fermentation. Salt will control the growth of pathogenic bacteria and spoilage microorganisms.
Kosher salt flakes are less dense than granular salt; as a result, you must use 50% more kosher salt to have an equivalent amount of salt specified in a recipe. For example, if a recipe calls for 1/2 cup of granulated salt, you must use a full cup of flaked salt (or 7.75 ounces by weight).
Dairy salt used for making cheese and yogurt is pure salt that can also be used in pickling brine. However, like kosher salt, it is not equivalent to granulated salt, and must be used at the rate of 7.75 ounces (by weight) per cup of granulated salt or 1 cup of dairy salt per 1/2 cup of granulated salt required in recipe.
Food-grade lime (calcium hydroxide) is used in an optional pre-pickling step to condition the texture or maintain the firmness of cucumbers when pickled. Use caution and follow directions on the product label for handling and preparation because lime is a strong alkaline chemical that can cause irritation to skin or when inhaled.
Food-grade calcium chloride is another optional firming agent that can be used in either refrigerated pickles or the salt brine of fermented pickles; use at the rate of one teaspoon per gallon of brine or pickling solution. Calcium chloride can also cause irritation to skin and lungs, so use caution and follow directions on the product label for handling and preparation.
Salt substitutes such as light salt or reduced-sodium salts should be used only in refrigerated fresh pack pickle recipes. The flavor and texture of pickles made with these salts is different and may not suit all tastes.
Vinegar. Use a high-grade cider or white distilled vinegar of 5% acidity. Cider vinegar tends to darken light-colored fruits and vegetables, so white distilled vinegar is often selected for a clear appearance. Never use homemade vinegar for making pickles because the percent of acidity is unknown, and acidity affects the safety and quality of the pickled product. For the same reason, do not reduce the amount of vinegar called for in a recipe.
Sugar. White granulated or brown sugar may be used in sweetened pickles. Brown sugar tends to give a tan color, but may be preferred for its flavor. Corn syrup and honey may produce undesirable flavors and are not recommended in pickling.
Seasonings. Various herbs and spices are often included in pickle and relish recipes for added taste. For superior flavors and aromas, buy fresh spices and herbs in small containers or amounts that will be used within a year. Old spices and herbs tend to become stale and powdery, often causing a cloudy, discolored liquid with poor flavor.
Water. Use clear, good-quality drinking water to make the pickling liquid and to wash fruits and vegetables. Very hard water causes pickles to shrivel. If water tends to be hard, distilled water can be used.
Pickling and Canning Equipment List
Ingredients used in pickling solutions sometimes react with the metals in utensils and containers. Do not use iron, copper, brass, or chipped enamelware utensils. Stainless steel, aluminum, and Pyrex-type utensils are best for heating pickling liquid. Stone jars, glass jars, crock pots, large casseroles, glass bowls, or food-grade plastic containers may be used for brining. Use a glass or nonmetallic plate to cover and hold vegetables 1 to 2 inches under the brine. A food-grade plastic freezer bag or glass jar filled with water placed on the plate makes an excellent weight to hold food below the surface.
Use a 1-gallon container for every 5 pounds of fresh vegetables or fruit or a 5-gallon container for 25 pounds. Never use garbage bags, trash can liners, or garbage cans for brining. These are not meant to hold food and are not food safe.
These utensils can help make home pickling easier: small, sharp paring and cutting knives; colander or wire basket; food chopper or grinder; tongs; ladle; slotted spoon; and wooden and/or stainless steel spoons.
In addition, the following items will be needed for the canning procedures.
-
Cutting board
-
Knife
-
Peeler/corer
-
Mixing spoons
-
Tongs
-
Measuring cup and spoon sets
-
Canning jars
-
Canning lids and screw bands
-
Re-sealable plastic bags for leftovers
-
Pot holders × 2
-
Paper towels
-
Cloth towels × 2
-
Dish soap and scrubber
-
Cooking pots in 1-quart and 5-quart sizes
-
Large strainer
-
Mixing bowl set in 2-, 3-, and 5-quart sizes
-
Canning set
-
Jar lifter
-
Magnetized lid lifter
-
Funnel
-
Plastic or rubber spatula (to release air bubbles in jars)
-
-
Boiling water canner with rack for proper elevation
General Canning Procedures
Use regular or wide-mouth Mason jars with self-sealing lids held in place by screw-on metal bands. The bands hold the lids in place during the processing and cooling periods, and can be removed and reused after cooling. Mason jars are made from tempered glass to resist high temperatures. Jars are available in 1/2 pint, pint, 1 1/2 pint, and quart sizes. Larger jars are not recommended for home canning. Do not reuse glass jars or bottles from commercially processed products such as mayonnaise because these jars will not withstand the water bath canner heating process.
Inspect jars carefully for cracks or chips and discard faulty ones. Wash jars in hot, soapy water and rinse thoroughly or clean using a dishwasher. To sterilize jars, keep jars hot in the dishwasher, a sink of hot water, or in a warm 180°F oven until they are filled. Check metal screw bands for signs of rust or dents. Discard corroded or dented bands. Use only new lids and follow the manufacturer’s directions for preparing lids for canning. Do not use lids that are missing any gasket compound, dented, deformed, or older than five years from date of manufacture.
Fill hot jars with food, allowing headspace as directed in the recipe. A wide-mouth food funnel keeps jars cleaner when filling. Remove air bubbles by carefully inserting a plastic or rubber spatula along the inside of the jar. Add food or liquid to achieve the recommended headspace. Wipe the top rim of the jar with a clean, damp cloth or paper towel. Place lid on rim and tighten screw band comfortably tight. DO NOT touch screw band until jar has been processed and cooled. See Figure 1 illustrating these steps for jar filling.
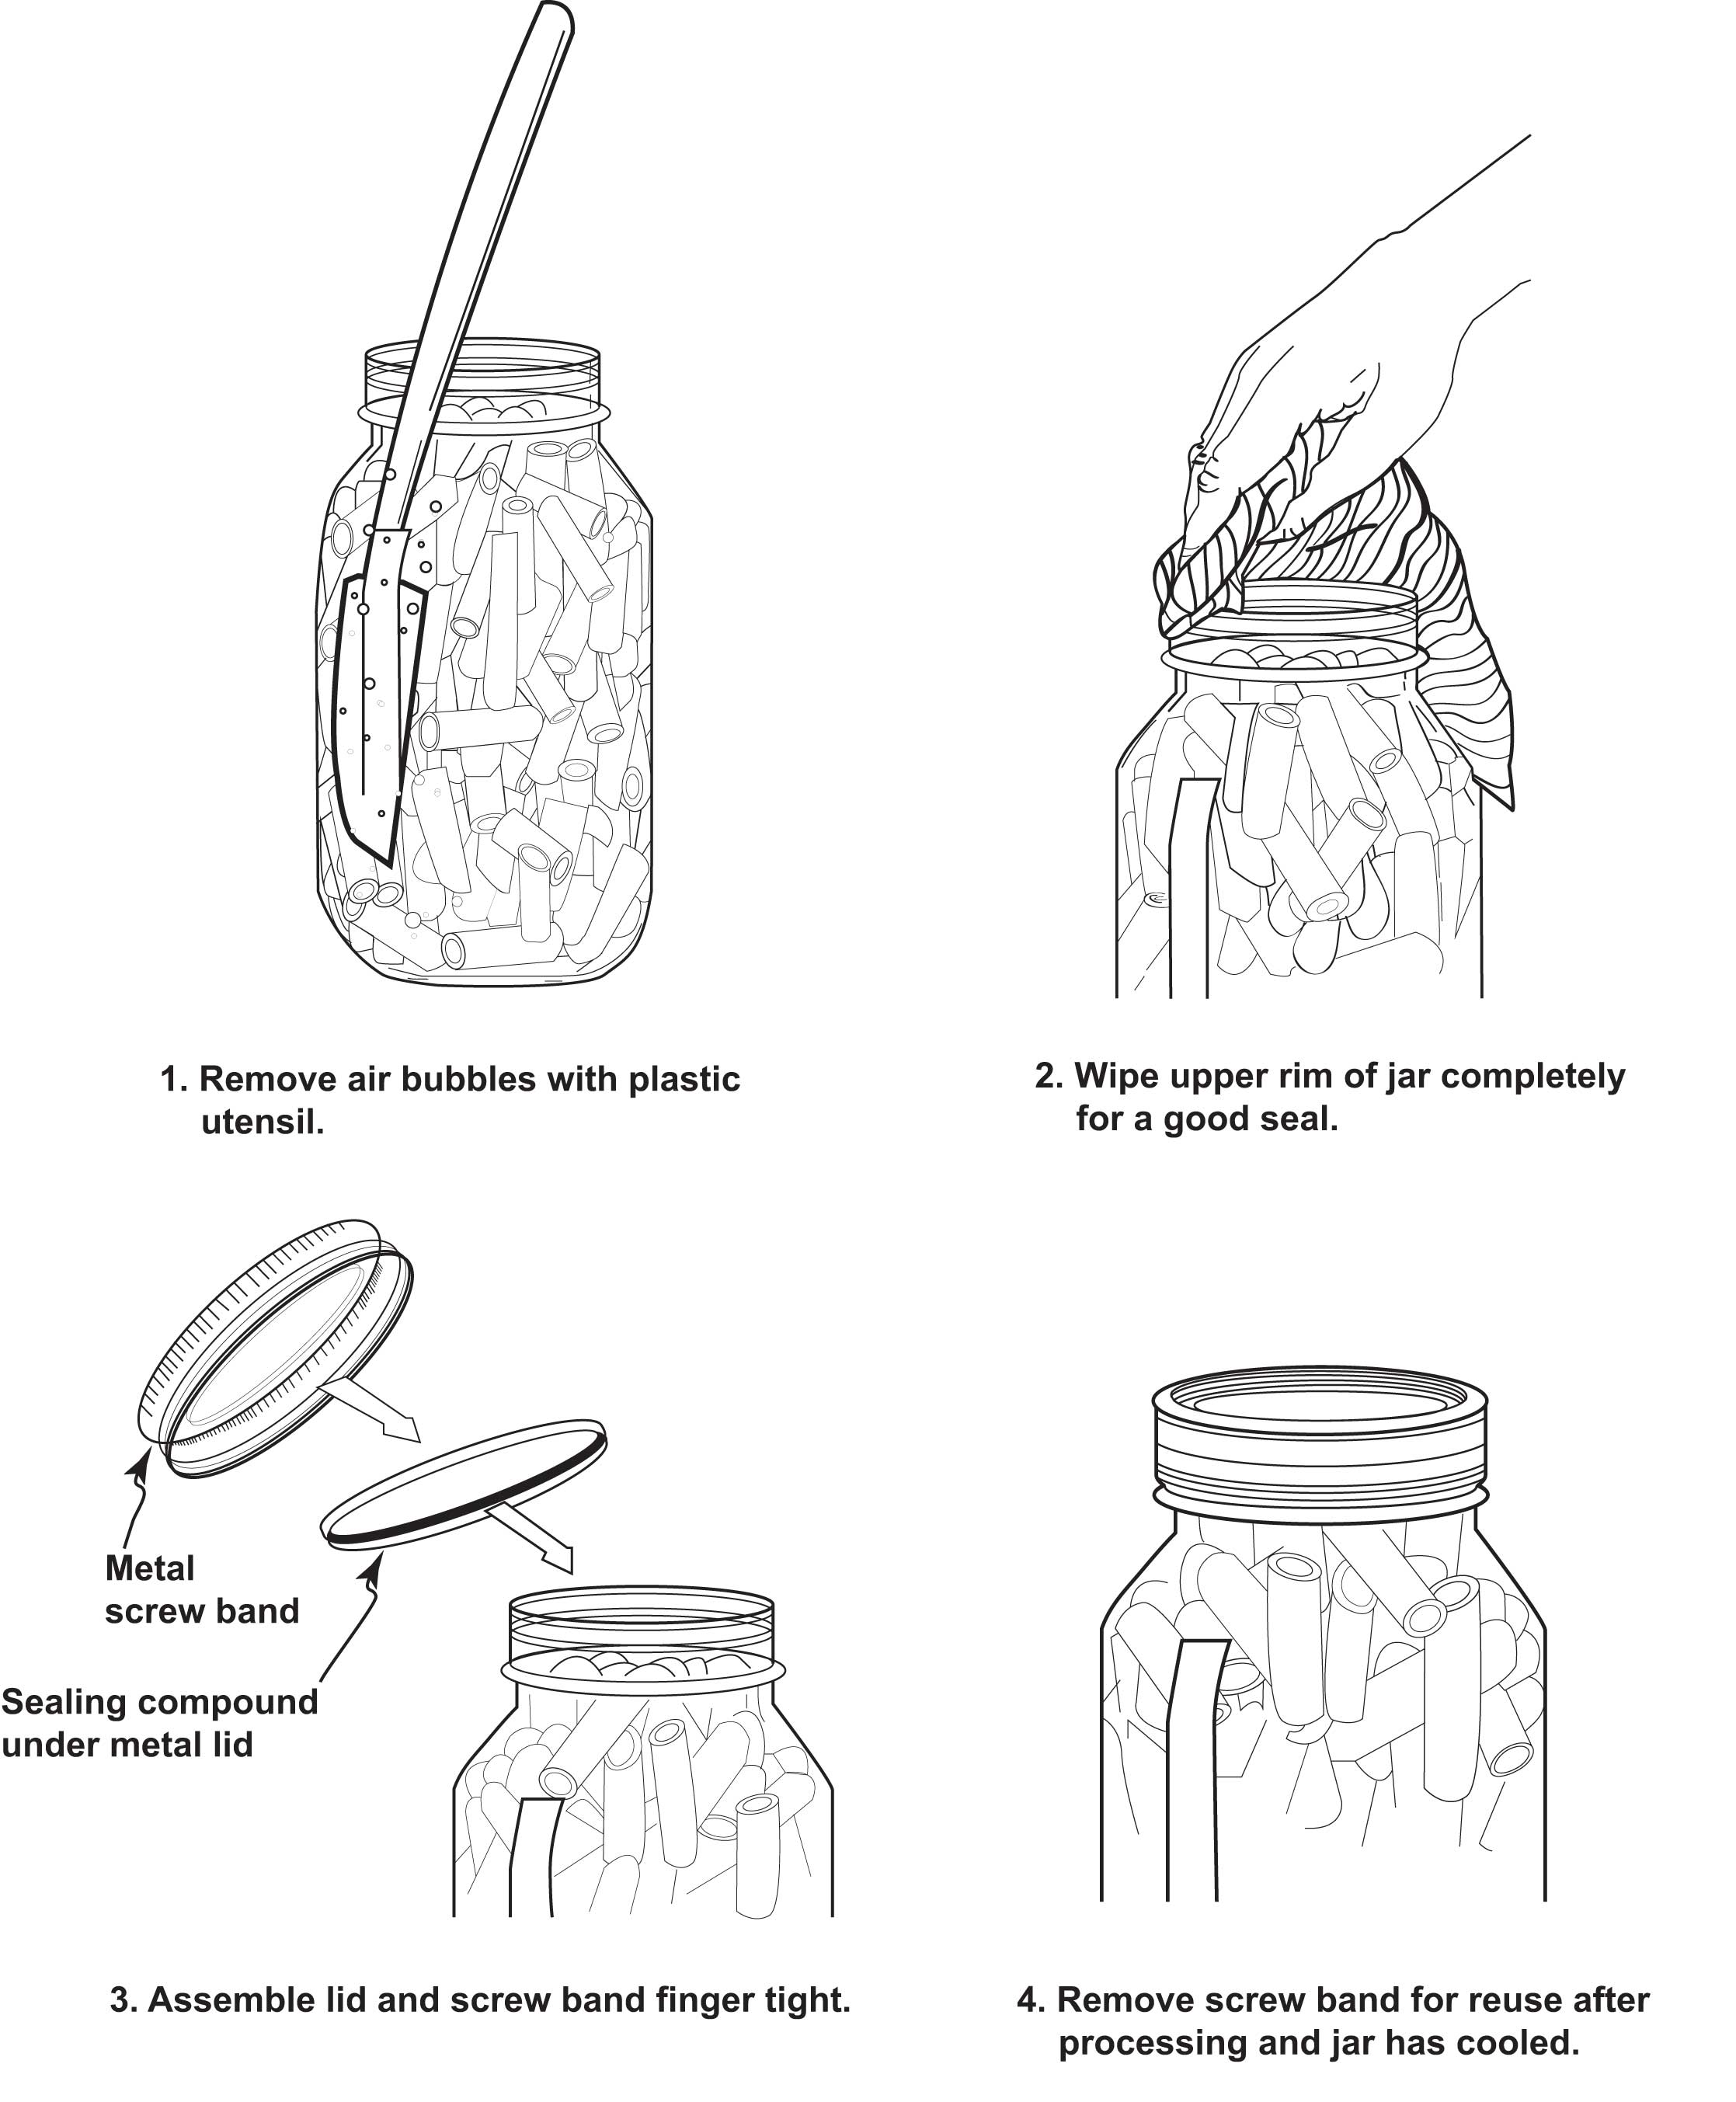
Figure 1. Procedure for filling canning jars before processing (illustrations adapted from USDA, 2009, for New Mexico State University by Susan B. Portillo).
The unfilled space between food or liquid in the jar and the lid is the headspace. This space allows for boiling and expansion of air in foods. The higher the temperature, the greater the expansion. The space also creates a vacuum as food cools. Headspace for home-canned pickles is generally 1/2 inch, but may vary; the recommended headspace is given in each recipe.
All recipes (except refrigerator pickles) use a boiling-water canner for the canning process.
Follow These Steps for Successful Boiling-Water Canning
-
Fill the canner halfway with water.
-
Preheat water to 140°F for raw-packed foods and to 180°F for hot-packed foods.
-
Load filled jars, fitted with lids, into the canner rack and use the handles to lower the rack into the water; or fill the canner, one jar at a time, with a jar lifter.
-
If necessary, add more boiling water so the water level is at least 1 inch above jar tops.
-
Turn heat to its highest position until water boils vigorously.
-
Set a timer for the minutes required for processing the food.
-
Cover with the canner lid and lower the heat setting to maintain a gentle boil throughout the process schedule.
-
Add more boiling water, if needed, to keep the water level above the jars.
-
When jars have been boiled for the recommended time, turn off the heat and remove the canner lid.
-
Using a jar lifter, remove the jars and place them on a towel, leaving at least 1 inch between the jars during cooling.
Low-temperature pasteurization treatment. The following treatment results in a better pickle texture, but must be carefully managed to avoid possible spoilage. Place jars in a canner half filled with warm water (120–140°F). Then add hot water to a level 1 inch above jars. Heat the water enough to maintain 180–185°F water temperature for 30 minutes. Use a candy or jelly thermometer to check the water temperature frequently to ensure that it is at least 180°F during the entire 30 minutes. Temperatures higher than 185°F may cause unnecessary softening of pickles. Caution: Use this procedure only when recipe indicates.
Test for Jar Seals
Remove screw bands when jars have cooled and test for vacuum seals by one of these methods (Figure 2):
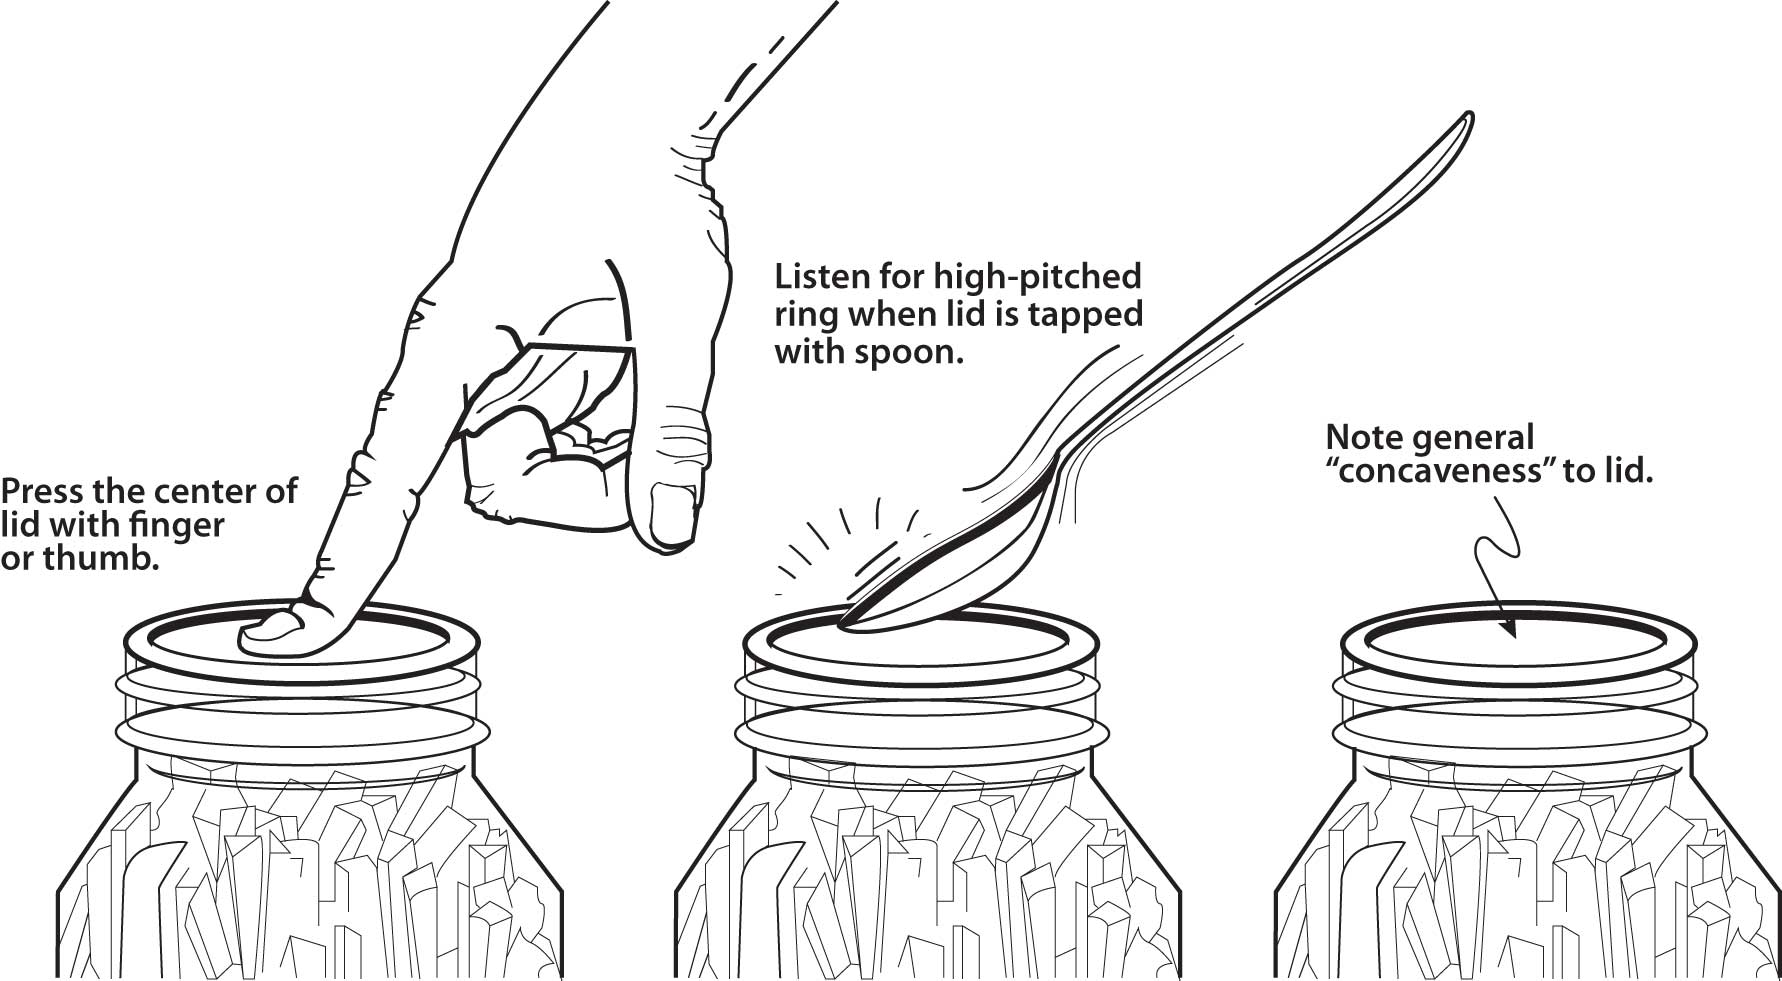
Figure 2. Procedure for testing jar seals after processing (illustrations adapted from USDA, 2009, for New Mexico State University by Susan B. Portillo).
-
Press the lid center with your finger. If the lid springs up when released, it is not sealed.
-
Tap the lid with a teaspoon. A sealed jar lid will make a ringing sound.
-
Hold the jar at eye level and look across the lid. A sealed jar lid curves down slightly in the center.
Reprocessing Unsealed Jars
Remove lids from unsealed jars and discard. Check the sealing surface of the jar for tiny nicks or cracks. If the jar has defects, discard it and replace it with another jar. If not, add a new lid and process for the same amount of time within 24 hours. Unsealed jars can be kept in the refrigerator if used within 2 weeks.
Storing Canned Food
Clean the outsides of sealed, cooled jars. Label with date and contents and store in a cool (50–70°F), dark, dry place away from sun, light, or dampness. Canned products are best if eaten within one year.
Accidental Freezing
Freezing may cause food in jars to spoil if the jars become unsealed. Freezing and thawing cause food to soften and lose eating quality. Protect jars from freezing by wrapping with layers of newspaper.
If Canned Food Spoils
Examine jars carefully before tasting food. Check lids for a vacuum seal. NEVER taste food from an unsealed jar. Signs of food spoilage are streaks and dried food at the top of the jar, swollen lids, broken jar seals, rising air bubbles, and any unnatural color. Other indicators include bad or unnatural odor; spurting liquid; white, blue, green, or black mold; or foaming.
Dispose of any food you suspect of being spoiled. For safety, spoiled canned food and containers may need to be detoxified before disposal. Contact your county Extension office (https://aces.nmsu.edu/county/) for detoxication instructions.
Elevation Adjustments
All communities in New Mexico are above sea level, varying from 3,000 to 10,000 feet, with differences even within a county.
Use Table 1 to determine the elevation of your community and then select safe processing times for canning your food. The boiling temperature of liquids is lower at higher elevations, and food must therefore be processed longer at high elevations.
|
Table 1. Elevations of Cities and Towns in New Mexico |
|||
|
City/Town |
Elevation (ft) |
City/Town |
Elevation (ft) |
|
Alamogordo |
4,350 |
Las Vegas |
6,450 |
|
Albuquerque |
5,000 |
Logan |
3,830 |
|
Artesia |
3,350 |
Lordsburg |
4,250 |
|
Aztec |
5,650 |
Los Alamos |
7,400 |
|
Bayard |
5,800 |
Los Ranchos de Albuquerque |
4,950 |
|
Belen |
4,800 |
Lovington |
3,900 |
|
Bernalillo |
5,050 |
Magdalena |
6,556 |
|
Bosque Farms |
4,864 |
Melrose |
4,599 |
|
Carlsbad |
3,100 |
Mora |
7,200 |
|
Carrizozo |
5,450 |
Mosquero |
5,550 |
|
Chama |
7,900 |
Mountainair |
6,500 |
|
Cimarron |
6,450 |
Portales |
4,010 |
|
Clayton |
5,050 |
Raton |
6,650 |
|
Cloudcroft |
8,650 |
Reserve |
5,749 |
|
Clovis |
4,300 |
Rio Rancho |
5,290 |
|
Columbus |
4,020 |
Roswell |
3,600 |
|
Corona |
6,664 |
Roy |
5,900 |
|
Corrales |
5,005 |
Ruidoso |
7,000 |
|
Cuba |
7,000 |
San Jon |
4,200 |
|
Deming |
4,300 |
Santa Fe |
7,000 |
|
Dexter |
3,500 |
Santa Rita |
6,300 |
|
Eagle Nest |
8,250 |
Santa Rosa |
4,600 |
|
Elida |
4,345 |
Silver City |
5,900 |
|
Española |
5,600 |
Socorro |
4,600 |
|
Estancia |
6,100 |
Springer |
5,800 |
|
Farmington |
5,400 |
Taos |
7,000 |
|
Fort Sumner |
4,050 |
Texico |
4,150 |
|
Gallup |
6,500 |
Tierra Amarilla |
7,460 |
|
Grants |
6,450 |
Truth or Consequences |
4,250 |
|
Hobbs |
3,650 |
Tucumcari |
4,100 |
|
Hurley |
5,700 |
Tularosa |
4,500 |
|
Jemez Springs |
6,200 |
Vaughn |
5,950 |
|
Las Cruces |
3,900 |
Wagon Mound |
6,200 |
Fermented Pickle Recipes
Fermented Dill Pickles
Use the following quantities for each gallon capacity of your container.
Yield: 4 quarts
4 lb 4-inch pickling cucumbers
2 Tbsp dill seed or 4–5 heads dill weed
2 cloves of garlic (optional)
2 dried red peppers (optional)
2 tsp mixed pickling spices (optional)
1/2 cup canning or pickling salt
1/4 cup vinegar (5%)
8 cups water
Wash cucumbers. Remove and discard about 1/16 inch off the blossom end but do not remove stem end. Place half the dill and spices in the bottom of a clean container. Add cucumbers and remaining dill and spices. Dissolve salt in vinegar and water in another container and pour over cucumbers. Add cover and weigh down the cover, making sure all pickles are submerged in the brining liquid.
Store for 3–4 weeks at 70–75°F. Temperatures of 55–65°F will take longer to develop full flavor. Higher temperatures (80°F or above) may cause softening of pickles. Check the container often and remove any surface scum or mold.
Caution: Discard pickles if they become soft or slimy or develop a disagreeable odor.
To can: Remove pickles and place in a clean container in the refrigerator. Pour brine into a pan and slowly heat to boiling. Simmer 5 minutes. Filter through coffee filters to reduce cloudiness. Fill jars with pickles and hot brine, leaving 1/2-inch headspace. Adjust lids and process (Table 2), or use the low-temperature pasteurization treatment described previously.
|
Table 2. Processing Times for Fermented Dill Pickles |
|||
|
Pack |
Jar |
Processing time (in minutes) |
|
|
1,000–6,000 ft |
Above 6,000 ft |
||
|
Raw |
Pint |
15 |
20 |
|
Raw |
Quart |
20 |
25 |
Note: Fully fermented pickles may be stored in the original fermenting container up to 4 to 6 months, but the container must be refrigerated. Remove surface scum and mold regularly.
Sauerkraut
Yield: about 9 quarts
25 lb cabbage, finely shredded
3/4 cup canning or pickling salt
Prepare a 5-gallon fermentation container, a plate to cover the container, and weight. Select firm cabbage heads, harvested within 24 to 48 hours. Work with about 5 pounds of cabbage at a time. Discard outer leaves and rinse heads under cold running water, then drain. Cut into quarters and remove cores. Shred cabbage very fine, about 1/8 to 1/16 inch. Mix 3 tablespoons of salt with every 5 pounds of shredded cabbage and pack firmly. Continue shredding, salting, and packing until all cabbage is in the container. The salt draws out the cabbage’s juices to form enough brine to cover the cabbage. Check the kraut daily for the first three days to ensure enough juice has been produced. If there is not enough juice, add a brine made by boiling 1 1/2 tablespoons of salt per 1 quart of water. Cool and add to shredded cabbage.
Add plate and weights. Cover the container with a clean towel. Store at 70–75°F while fermenting for 3 to 4 weeks. Maintain this temperature for best results.
If using a brine-filled bag to weigh cabbage down, allow fermentation to complete (bubbles cease) before disturbing the sauerkraut. If using water-filled jars as weights, check the kraut two or three times each week. Remove scum as it forms.
Store sauerkraut in the refrigerator in tightly covered jars for several months. Sauerkraut can also be canned.
Hot pack: Slowly bring kraut and liquid to a boil in a pot. Stir frequently. Remove from heat and fill jars tightly with kraut and juices, leaving 1/2-inch headspace. Adjust lids and process (Table 3).
Raw pack: Fill jars tightly with kraut and cover with juices, leaving 1/2-inch headspace. Adjust lids and process (Table 3).
|
Table 3. Processing Times for Sauerkraut |
||||
|
Pack |
Jar |
Processing time (in minutes) at elevation of |
||
|
1,000–3,000 ft |
3,001–6,000 ft |
Above 6,000 ft |
||
|
Hot |
Pint |
15 |
15 |
20 |
|
Hot |
Quart |
20 |
20 |
25 |
|
Raw |
Pint |
25 |
30 |
35 |
|
Raw |
Quart |
30 |
35 |
40 |
Refrigerator Recipes
(Refrigerator pickle recipes taken from Barbara H. Ingham, 2008, Homemade Pickles & Relishes, Wisconsin Safe Food Preservation Series B2267, University of Wisconsin Cooperative Extension. Used with permission.)
(© Christian De Grandmaison | Dreamstime.com)
Cucumber Pickles with Onions or Vegetable Medley
Yield: 4 pints
8 cups cucumbers, thinly sliced
1 cup onion, peeled and sliced
(2 medium onions), or in place of onion, an equal amount of other vegetables such as cauliflower, peppers, or carrots as desired
4 cups vinegar (5%)
2 cups sugar
1/3 cup canning or pickling salt
1 1/2 tsp each of celery seed, mustard seed, and turmeric
Wash and prepare vegetables, trim blossom ends from cucumbers and discard. Mix vinegar, sugar, salt, and spices together until sugar is dissolved. This mixture does not have to be heated, but heating will more rapidly dissolve the sugar and pickle the vegetables.
Fill hot pint jars with thinly sliced cucumbers and other vegetables. Cover vegetables with hot pickling solution, and cap jars with clean lids. Label and date, and store in the refrigerator at 40°F or colder for up to 2 weeks. This pickle is not heat processed and must be kept refrigerated.
Pickled Horseradish Sauce
Yield: 2 half pints
2 cups freshly grated horseradish (3/4 lb)
1 cup white vinegar (5%)
1/2 tsp canning or pickling salt
1/4 tsp ascorbic acid, powdered (if desired,
to prevent browning)
Wash horseradish roots and peel off brown outer skin. The pungency of fresh horseradish fades within 1 to 2 months, even when refrigerated, so make only a small batch at a time.
Grate peeled roots in a food processor, or cut into small cubes and put through a food grinder.
Combine grated horseradish with vinegar, salt, and ascorbic acid (if desired). Fill half-pint jars, leaving 1/4-inch headspace. Remove bubbles with a rubber spatula. Wipe jar rims with a clean, damp cloth.
Cover jars tightly with clean lids. Label and date, and store in the refrigerator at 40°F or colder for up to 2 months. This pickle is not heat processed and must be kept refrigerated.
Fresh Pack Recipes
Quick Fresh Pack Dill Pickles
Yield: 7 to 9 pints
8 lb of 3- to 5-inch pickling cucumbers
2 gallons water
1 1/4 cup canning or pickling salt (divided into 3/4-cup and 1/2-cup portions)
1 1/2 qt vinegar (5%)
1/4 cup sugar
2 qt water
2 Tbsp whole mixed pickling spice (in cheesecloth bag)
about 3 Tbsp whole mustard seed (1 tsp per pint jar)
about 14 heads of fresh dill (1 1/2 heads per pint jar), or 4 1/2 Tbsp dill seed (1 1/2 tsp per pint jar)
Prepare ingredients in a five-gallon container for easier mixing and handling. Wash cucumbers. Remove and discard about 1/16 inch off the blossom end, but leave 1/4 inch of stem attached. Dissolve 3/4 cup salt in 2 gallons water. Pour over cucumbers and let stand for 12 hours. Drain. Combine vinegar, 1/2 cup salt, sugar, and 2 quarts water. Add cheesecloth bag of mixed pickling spices. Heat to boiling. Fill jars with cucumbers. Add 1 teaspoon mustard seed and 1 1/2 heads fresh dill or 1 1/2 tsp dill seed per pint. Cover with boiling pickling solution, leaving 1/2-inch headspace. Adjust lids and process (Table 4), or use the low-temperature pasteurization treatment described previously.
|
Table 4. Processing Times for Quick Fresh Pack Dill Pickles |
|||
|
Pack |
Jar |
Processing time (in minutes) |
|
|
1,000–6,000 ft |
Above 6,000 ft |
||
|
Raw |
Pint |
15 |
20 |
|
Raw |
Quart |
20 |
25 |
Quick Sweet Pickles
Yield: 7 to 9 pints
8 lb of 3- to 4-inch pickling cucumbers
1/3 cup canning or pickling salt
2 trays or 2 qt of crushed ice or ice cubes
4 1/2 cups sugar
3 1/2 cups vinegar (5%)
2 tsp celery seed
1 Tbsp whole allspice
2 Tbsp mustard seed
1 cup pickling lime (optional; for use in variation below to make firmer pickles)
Wash cucumbers. Remove and discard about 1/16 inch off the blossom end, but leave 1/4 inch of stem attached. Slice or cut into strips, if desired. Place in bowl and sprinkle with 1/3 cup salt. Cover with 2 inches of crushed or cubed ice. Refrigerate 3 to 4 hours. Add more ice as needed. Drain well.
Combine sugar, vinegar, celery seed, allspice, and mustard seed in a 6-quart kettle. Heat to boiling.
Hot pack: Add cucumbers and heat slowly until vinegar solution returns to boil. Stir occasionally to make sure mixture heats evenly. Fill jars with cucumbers and vinegar solution, leaving 1/2-inch headspace. Adjust lids and process (Table 5), or use the low-temperature pasteurization treatment described previously.
Raw pack: Fill jars with cucumbers, leaving 1/2-inch headspace. Add hot pickling syrup, leaving 1/2-inch headspace. Adjust lids and process (Table 5), or use the low-temperature pasteurization treatment described previously.
Variation for firmer pickles: Wash cucumbers. Remove and discard about 1/16 inch off the blossom end, but leave 1/4 inch of stem attached. Slice cucumbers or cut into strips. Mix 1 cup pickling lime and 1/2 cup salt with 1 gallon of water in a 2- to 3-gallon crock or enamelware container.
Caution: Avoid inhaling lime dust while mixing the lime–water solution. Soak cucumber slices or strips in lime–water solution for 12 to 24 hours, stirring occasionally. Remove from lime solution and rinse and resoak in fresh cold water for 1 hour. Repeat the rinsing and resoaking two more times. Handle carefully because slices or strips will be brittle. Drain well.
Storage: After processing (Table 5) and cooling, jars should be stored 4 to 5 weeks to develop ideal flavor.
Variation: Add 2 slices of raw whole onion to each jar before filling with cucumbers.
|
Table 5. Processing Times for Quick Sweet Pickles |
|||
|
Pack |
Jar |
Processing time (in minutes) |
|
|
1,000–6,000 ft |
Above 6,000 ft |
||
|
Hot |
Pint |
10 |
15 |
|
Hot |
Quart |
10 |
15 |
|
Raw |
Pint |
15 |
20 |
|
Raw |
Quart |
20 |
25 |
(© Zigzagmtart | Dreamstime.com)
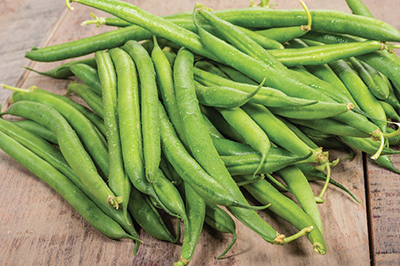
Pickled Dill Beans
Yield: about 8 pints
4 lb fresh, tender green or yellow beans (5–6 inches long)
8–16 heads of fresh dill
8 cloves garlic (optional)
1/2 cup canning or pickling salt
4 cups white vinegar (5%)
4 cups water
1 tsp hot red pepper flakes (optional)
Wash and trim ends from beans and cut to 4-inch lengths. Place 1 or 2 heads of dill and 1 clove of garlic in each pint jar. Place beans upright in jars, leaving 1/2-inch headspace. Trim beans to ensure proper fit. Combine salt, vinegar, water, and pepper flakes in a pan and heat to boiling. Add vinegar solution to beans, leaving 1/2-inch headspace. Adjust lids and process (Table 6).
|
Table 6. Processing Times for Pickled Dill Beans |
|||
|
Pack |
Jar |
Processing time (in minutes) |
|
|
1,000–6,000 ft |
Above 6,000 ft |
||
|
Raw |
Pint |
10 |
15 |
Bread and Butter Pickles
Yield: 8 pints or 4 quarts
6 lb 4- to 5-inch pickling cucumbers
8 cups thinly sliced onions (about 3 lb)
1/2 cup canning or pickling salt
2 trays or 2 qt of crushed ice or ice cubes
4 cups vinegar (5%)
4 1/2 cups sugar
1 Tbsp turmeric
1 1/2 Tbsp celery seed
2 Tbsp mustard seed
Wash cucumbers with a vegetable brush. Trim 1/16 inch off the blossom end and discard. Slice unpeeled cucumbers into 3/16-inch slices. Combine cucumbers and onions in a large bowl. Add salt. Cover with 2 inches of ice. Refrigerate 3–4 hours. Add ice as needed. Drain thoroughly.
Combine vinegar, sugar, and spices in a large pot. Boil 10 minutes. Add cucumbers and onions and slowly reheat to boiling. Fill jars with cucumbers, onions, and syrup, leaving 1/2-inch headspace. Adjust lids and process (Table 7), or use the low-temperature pasteurization treatment described previously.
|
Table 7. Processing Times for Bread and Butter Pickles |
|||
|
Pack |
Jar |
Processing time (in minutes) |
|
|
1,000–6,000 ft |
Above 6,000 ft |
||
|
Hot |
Pint or quart |
15 |
20 |
(© Danelle Mccollum | Dreamstime.com)
Pickled Beets
Yield: about 8 pints
7 lb beets, 2- to 2 1/2-inches in diameter
4 to 6 onions, 2- to 2 1/2-inches in diameter (optional)
4 cup vinegar (5%)
1 1/2 tsp canning or pickling salt
2 cups sugar
2 cups water
2 cinnamon sticks (in cheesecloth bag)
12 whole cloves (in cheesecloth bag)
Trim beet tops, but leave 1 inch of stems and roots to prevent color bleeding. Wash thoroughly. Use similar sized beets to ensure even cooking. Place in a pan, cover with boiling water, and cook until tender (about 25 to 30 minutes). Drain and cool. Trim roots and stems and remove skins. Slice into 1/4-inch thick slices. Peel and thinly slice onions. Combine vinegar, salt, sugar, and fresh water in a pan. Tie spices in a cheesecloth bag and add to vinegar mixture, then heat to boiling. Add beets and onions. Simmer 5 minutes. Remove spice bag and discard. Fill jars with beets and onions, leaving 1/2-inch headspace. Add hot vinegar solution to cover beets, leaving 1/2-inch headspace. Adjust lids and process (Table 8).
|
Table 8. Processing Times for Pickled Beets |
||||
|
Pack |
Jar |
Processing time (in minutes) |
||
|
1,000– |
3,001–6,000 ft |
Above |
||
|
Hot |
Pint or quart |
35 |
40 |
45 |
Pickled Cauliflower or Brussels Sprouts
Yield: 9 half pints
12 cups 1- to 2-inch cauliflower florets or small Brussels sprouts
4 tsp canning or pickling salt
1 gallon water
4 cups white vinegar (5%)
2 cups sugar
2 cups thinly sliced onion
1 cup diced red bell pepper
2 Tbsp mustard seed
1 Tbsp celery seed
1 tsp turmeric
1 tsp hot red pepper flakes
Wash cauliflower florets or Brussels sprouts. Remove stems and blemished outer leaves. Combine salt and water in a large (6-quart) pot and heat to boiling. Add cauliflower florets and boil 3 minutes (4 minutes for Brussels sprouts). Drain and cool. Combine vinegar, sugar, onion, red pepper, and spices in a large saucepan. Heat to boiling and simmer 5 minutes. Fill jars with cauliflower or Brussels sprouts, leaving 1/2-inch headspace. Distribute onion and diced peppers equally among jars and fill with pickling solution, leaving 1/2-inch headspace. Adjust lids and process (Table 9).
|
Table 9. Processing Times for Pickled Cauliflower or Brussels Sprouts |
|||
|
Pack |
Jar |
Processing time (in minutes) |
|
|
1,000–6,000 ft |
Above 6,000 ft |
||
|
Hot |
Half-pint or pint |
15 |
20 |
Marinated Whole Mushrooms
Yield: 9 half pints
7 lb small whole mushrooms
1/2 cup bottled lemon juice
2 cups olive or salad oil
2 1/2 cups white vinegar (5%)
1 Tbsp dried oregano leaves
1 Tbsp dried basil leaves
1 Tbsp canning or pickling salt
1/2 cup finely chopped onion
1/4 cup diced pimento
2 cloves of garlic, cut in quarters
25 black pepper corns
Select fresh, small, unopened mushrooms with caps less than 1 1/4 inch in diameter. Wash. Cut stems, leaving about 1/4-inch attached to cap. Place mushrooms in a pot and add lemon juice and enough water to cover. Heat to boiling and simmer 5 minutes. Drain. Mix olive oil, vinegar, oregano, basil, and salt in a saucepan. Stir in onions and pimento. Heat to boiling. Place 1/4 garlic clove and 2–3 peppercorns in each half-pint jar. Fill jars with mushrooms and hot, well-mixed vinegar and oil solution, leaving 1/2-inch headspace. Adjust lids and process (Table 10).
|
Table 10. Processing Times for Marinated Whole |
||||
|
Pack |
Jar size |
Processing time (in minutes) |
||
|
1,000– |
3,001– |
Above |
||
|
Hot |
Half-pint |
25 |
30 |
35 |
Pickled Dill Okra
Yield: 8 to 9 pints
7 lb small okra pods
8 or 9 garlic cloves
2/3 cup canning or pickling salt
6 small hot peppers (such as jalapeño, serrano, or Thai chiles)
4 tsp dill seed
6 cups water
6 cups vinegar (5%)
Wash and trim okra. Place 1 garlic clove in each jar. Pack jars firmly with okra, leaving 1/2-inch headspace. Combine salt, peppers, dill seed, water, and vinegar in a saucepan and bring to a boil. Pour the hot pickling solution over the okra, leaving 1/2-inch headspace. Adjust lids and process (Table 11).
|
Table 11. Processing Times for Pickled Dill Okra |
|||
|
Pack |
Jar |
Processing time (in minutes) |
|
|
1,000–6,000 ft |
Above 6,000 ft |
||
|
Hot |
Pint |
15 |
20 |
Fruit Pickle Recipes
Spiced Crab Apples
Yield: 9 pints
5 lb crab apples
4 1/2 cups cider vinegar (5%)
3 3/4 cups water
7 1/2 cups sugar
4 tsp whole cloves (in cheesecloth bag)
4 sticks of cinnamon (in cheesecloth bag)
6 (six) 1/2-inch cubes of fresh ginger root (in cheesecloth bag)
Carefully remove leaves or blossom petals from apples, but do not remove stems. Wash apples. Puncture skin of apples four or five times with a toothpick. Tie spices in a cheesecloth bag. Mix
vinegar, water, sugar, and spice bag in a large pot and bring to a boil. Place 1/3 of the apples at a time in a wire basket or sieve and dip for 2 minutes in the boiling solution. Place cooked apples and spice bag in 2-gallon crock. Pour hot syrup over apples. Cover and let stand overnight. Remove spice bag and discard; drain syrup into saucepan and heat to boiling. Fill jars with apples, leaving 1/2-inch headspace. Pour hot syrup over apples, leaving 1/2-inch headspace. Adjust lids and process (Table 12).
|
Table 12. Processing Times for Spiced Crab Apples |
|||
|
Pack |
Jar |
Processing time (in minutes) |
|
|
1,000–6,000 ft |
Above 6,000 ft |
||
|
Hot |
Pint |
30 |
35 |
Spiced Apple Rings
Yield: 8 to 9 pints
12 lb firm, tart apples (maximum diameter of 2 1/2 inches)
ascorbic acid solution (see recipe below)
12 cups sugar
6 cups water
1 1/4 cup white vinegar (5%)
3 Tbsp whole cloves
3/4 cup red cinnamon candies, or 8 cinnamon sticks and 1 tsp of red food coloring
Wash, peel, core, and slice one apple at a time to prevent discoloration. Cut crosswise into 1/2-inch slices. Immerse slices in ascorbic acid solution (1 tsp ascorbic acid per 1 gallon of cold water).
Add sugar, water, vinegar, cloves, and cinnamon candies or cinnamon sticks and food coloring to a 6-quart saucepan to make syrup. Stir to combine. Heat to boiling and simmer 3 minutes. Drain apple rings from ascorbic acid and add to hot syrup. Cook 5 minutes. Fill jars with the apple rings and flavored syrup, leaving 1/2-inch headspace. Adjust lids and process (Table 13).
|
Table 13. Processing Times for Spiced Apple Rings |
|||
|
Pack |
Jar size |
Processing time (in minutes) |
|
|
1,000–6,000 ft |
Above 6,000 ft |
||
|
Hot |
Pint |
15 |
20 |
Relish Recipes
(© Dulsita | Dreamstime.com)
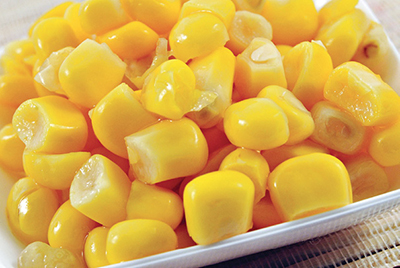
Pickled Corn Relish
Yield: about 9 pints
10 cups fresh, whole kernel corn (16 to 20 medium-size ears or 6 10-ounce packages frozen corn)
2 1/2 cups diced sweet red pepper
2 1/2 cups diced sweet green pepper
2 1/2 cups chopped celery
1 1/4 cups diced onion
1 3/4 cups sugar
5 cups vinegar (5%)
2 1/2 tsp canning or pickling salt
2 1/2 tsp celery seed
2 1/2 tsp dry mustard
1 1/4 tsp turmeric
If using fresh corn, boil ears for 5 minutes in a large pot, dip in cold water, and drain. Cut kernels off cob. Combine all ingredients, except corn, mustard, and turmeric, in a saucepan. Heat to boiling and simmer 5 minutes. Remove 1/2 cup of the simmered mixture and mix in mustard and turmeric. Add this mixture and corn to the hot mixture. Simmer 5 minutes more. Fill jars with hot relish, leaving 1/2-inch headspace. Adjust lids and process (Table 14).
|
Table 14. Processing Times for Pickled Corn Relish |
|||
|
Pack |
Jar |
Processing time (in minutes) |
|
|
1,000–6,000 ft |
Above 6,000 ft |
||
|
Hot |
Half-pint or pint |
20 |
25 |
Pickled Green Tomato Relish
Yield: 7 to 9 pints
10 lb small, hard green tomatoes
1 1/2 lb red bell peppers
1 1/2 lb green bell peppers
2 lb onions
1/2 cup canning or pickling salt
1 qt water
4 cups sugar
1 qt vinegar (5%)
1/3 cup prepared yellow mustard
2 Tbsp cornstarch
Wash and finely chop tomatoes, peppers, and onions. Place in a large kettle. Dissolve pickling salt in water and pour over vegetables. Heat vegetables and salt solution to boiling and simmer 5 minutes. Drain in colander. Return vegetables to kettle. Add sugar, vinegar, mustard, and cornstarch and mix. Heat to boiling and simmer 5 minutes. Fill jars with hot relish, leaving 1/2-inch headspace. Adjust lids and process (Table 15).
|
Table 15. Processing Times for Pickled Green Tomato Relish |
|||
|
Pack |
Jar |
Processing time (in minutes) at elevation of |
|
|
1,000–6,000 ft |
Above 6,000 ft |
||
|
Hot |
Pint |
10 |
15 |
(© Lodrakon | Dreamstime.com)
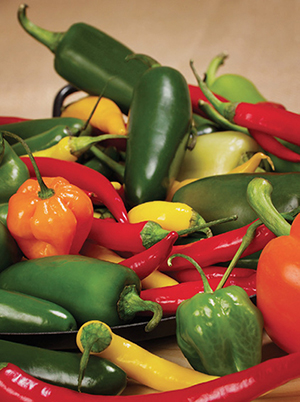
Pickled Hot Peppers
Yield: about 9 pints
4 lb hot, long red/green/yellow peppers (such as Hungarian, banana, New Mexico-type chile, or jalapeño; you can use one pepper type by itself or a mix of different peppers)3 lb sweet, mixed red and green peppers
5 cups vinegar (5%)
1 cup water
4 tsp canning or pickling salt
2 Tbsp sugar
2 cloves of garlic
Caution: Wear rubber gloves when handling hot peppers or wash hands thoroughly with soap and water after handling peppers and before touching your face.
Wash peppers. If peppers are small, leave whole. Cut two slits in each. Blanch in boiling water or blister (in oven broiler or on stovetop) in order to peel. Cool, then peel off skin and remove seeds and stems. Flatten small peppers, quarter larger peppers. Fill jars with peppers, leaving 1/2-inch headspace. Combine vinegar, water, salt, sugar, and garlic and heat to boiling, then simmer 10 minutes. Remove garlic. Pour hot pickling solution over peppers, leaving 1/2-inch headspace. Adjust lids and process (Table 16).
|
Table 16. Processing Times for Pickled Hot Peppers |
|||
|
Pack |
Jar |
Processing time (in minutes) |
|
|
1,000–6,000 ft |
Above 6,000 ft |
||
|
Hot |
Half-pint or pint |
15 |
20 |
Pickle Relish
Yield: 9 pints
3 qt chopped cucumbers
3 cups chopped sweet green peppers
3 cups chopped sweet red peppers
1 cup chopped onions
3/4 cup canning or pickling salt
1 tray or 1 qt of crushed ice or ice cubes
8 cups water
4 tsp each: mustard seed, turmeric, whole allspice, and whole clove
2 cups sugar
6 cups white vinegar (5%)
Add cucumbers, peppers, onions, salt, and ice to water and let stand 4 hours. Drain and cover vegetables with fresh ice water for 1 hour. Drain again. Combine spices in a spice or cheesecloth bag. Add spices to sugar and vinegar. Heat to boiling and pour mixture over vegetables. Cover and refrigerate 24 hours. Heat mixture to boiling and pour hot into clean jars, leaving 1/2-inch headspace. Adjust lids and process (Table 17).
|
Table 17. Processing Times for Pickle Relish |
|||
|
Pack |
Jar |
Processing time (in minutes) |
|
|
1,000–6,000 ft |
Above 6,000 ft |
||
|
Hot |
Half-pint or pint |
15 |
20 |
Pickled Bread and Butter Zucchini
Yield: 8 to 9 pints
16 cups sliced fresh zucchini
4 cups finely sliced onions
1/2 cup canning or pickling salt
4 cups vinegar (5%)
2 cups sugar
4 Tbsp mustard seed
2 tsp turmeric
2 Tbsp celery seed
Cover zucchini and onion slices with 1 inch of water and the salt in a pan. Let stand 2 hours. Drain thoroughly. Combine vinegar, sugar, and spices. Bring to boil and add zucchini and onions. Simmer 5 minutes. Fill jars with mixture and pickling solution, leaving 1/2-inch headspace. Adjust lids and process (Table 18), or use low-temperature pasteurization treatment described previously.
|
Table 18. Processing Times for Pickled Bread and Butter Zucchini |
|||
|
Pack |
Jar |
Processing time (in minutes) |
|
|
1,000–6,000 ft |
Above 6,000 ft |
||
|
Hot |
Pints or quart |
15 |
20 |
Causes of Poor-Quality Pickles
Shriveled pickles can be the result of using too strong a vinegar, sugar, or salt solution at the start of the pickling process and/or overcooking or over-processing.
Hollow pickles are usually caused by:
• Poorly developed cucumbers.
• Holding cucumbers too long before pickling.
• Fermentation that is too rapid.
• A brine that is too strong or too weak during fermentation.
Soft or slippery pickles result from microbial activity caused by:
• Too little salt or acid.
• Cucumbers not covered with brine during fermentation.
• Scum not removed from brine during fermentation.
• Insufficient heat treatment.
• A seal that is not airtight.
• Moldy garlic or spices.
• Blossom ends not entirely removed from the cucumbers.
Dark pickles may be caused by:
• Use of ground spices.
• Too much spice.
• Old spices.
• Iodized salt.
• Overcooking.
• Iron or other minerals in water.
• Use of iron utensils.
• Leaving a cinnamon stick or other spices in the jar.
Causes of Spoilage in Sauerkraut
Signs of spoiled sauerkraut include undesirable color, off-flavor, off-odor, and soft texture.
Soft kraut may be the result of:
• Insufficient salt.
• High temperatures during fermentation.
• Uneven salt distribution.
• Air pockets caused by improper packing.
Pink kraut is caused by the growth of certain types of yeast on kraut. These grow if there is:
• Too much salt.
• Uneven distribution of salt.
• Improper covering or weighting during fermentation.
Dark kraut may be caused by:
• Unwashed and improperly trimmed cabbage.
• Insufficient juice to cover fermenting cabbage.
• Uneven salt distribution.
• Exposure to air.
• High temperatures during fermentation, processing, and storage.
• Long storage period.
Rotted kraut is usually found on the surface where the cabbage has not been sufficiently covered to exclude air during fermentation.
| Original authors: Priscilla Grijalva, Extension Food and Nutrition Specialist. Subsequently revised by Alice Jane Hendley, Extension Food and Nutrition Specialist; and Martha Archuleta, Extension Food and Nutrition Specialist. |
For Further Reading
E-307: Home Canning of Vegetables
https://pubs.nmsu.edu/_e/E307/
E-319: Home Canning of Fruits
https://pubs.nmsu.edu/_e/E319/
E-323: Salsa Recipes for Canning
https://pubs.nmsu.edu/_e/E323/
All Food and Nutrition Publications Listing
https://pubs.nmsu.edu/_e/

Nancy Flores is the Extension Food Technology Specialist in the Department of Extension Family and Consumer Sciences at NMSU. She earned her B.S. at NMSU, M.S. at the University of Missouri, and Ph.D. at Kansas State. Her Extension activities focus on food safety, food processing, and food technology.

Cindy Schlenker Davies is the County Program Director and Extension Home Economist at NMSU’s Bernalillo County Extension Office. She earned her B.S. at Eastern New Mexico University and her M.A. at NMSU. Her Extension and public outreach work focuses on food processing and preservation and food safety.
To find more resources for your business, home, or family, visit the College of Agricultural, Consumer and Environmental Sciences on the World Wide Web at pubs.nmsu.edu
Contents of publications may be freely reproduced for educational purposes. All other rights reserved. For permission to use publications for other purposes, contact pubs@nmsu.edu or the authors listed on the publication.
New Mexico State University is an equal opportunity/affirmative action employer and educator. NMSU and the U.S. Department of Agriculture cooperating
Revised November 2016 Las Cruces, NM


