Guide C-309
Revised by Jennah McKinley
College of Agricultural, Consumer and Environmental Sciences, New Mexico State University
Author: Extension Family and Consumer Sciences Agent, Eddy County Extension Office, New Mexico State University. (Print friendly PDF)
Pressing helps to keep clothes looking their best. It smooths away wrinkles and aids in restoring the fabric’s original texture. Good pressing is also helpful in preserving the shape and fit of the garment.

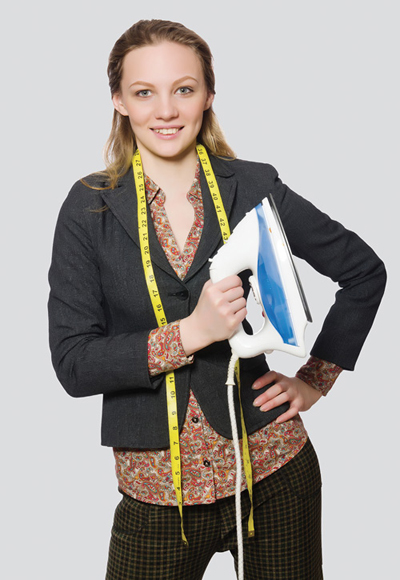
© Elnur | Dreamstime.com
What is Good Pressing?
Good pressing is different from ironing. Most pressing should be done by lowering and lifting the iron rather than moving it over the cloth as you do when ironing. This “lower and lift” motion applies pressure where needed and helps to avoid stretching the fabric. Almost all pressing is done from the wrong side of the fabric. When pressing is done on the right side of the fabric, always use a press cloth or a special iron attachment to prevent fabric shininess.
The amounts of heat, moisture, and pressure needed for a good pressing job must be determined with care. The amounts used will depend on the way the garment is made as well as the fiber content, weave, texture, and finish. Garment care labels will help determine procedures to be followed.
Pressing incorrectly can pull fabric out of line and give it a shiny “ironed” look. It will flatten curves, stretch the neckline, ripple the skirt hem, and generally change the shape of the garment.
Pressing as You Sew
Careful pressing is required for successful sewing; it should not be put off until a garment is finished. A “stitch-and-press” approach makes for a more professional look when a garment is completed. An iron and ironing board should be set up near the sewing area, ready to use when needed. The following are some pressing pointers to use as you sew.
Before You Start
Press wrinkles and folds from the cloth before you cut out a garment. Take care to avoid stretching the fabric. Smooth wrinkled pattern pieces with a moderately warm iron to ensure accurate cutting lines.
Selecting Pressing Temperature
The correct iron temperature depends on the garment fabric—its fiber content and finish. An easy way to check the most effective temperature is to press a scrap of the fabric before using the iron on the garment. Compare the pressed surface of the scrap with the unpressed fabric. Too much heat, steam, or pressure may dull or flatten the fabric surface.
The temperature setting guide on most irons indicates the heat setting suitable for a variety of fabrics. Set the iron according to the chart for best results, then follow these general pressing suggestions for popular fabrics:
Acetate—Use a press cloth when using steam. Place paper under seam allowances and darts to prevent imprints.
Blends—Set the iron according to the fiber requiring the lowest temperature. Press on wrong side or use press cloth on right side.
Cotton—Press on either side with steam or after fabric is dampened with a sponge or by spraying with water. If fabric shine occurs, use a press cloth.
Linen—Highest setting on iron is used along with dampened press cloth or steam. Press on wrong side to prevent shine.
Polyester—Press on wrong side or with press cloth. Use steam and dampened press cloth to smooth seams and set creases.
Rayon—Use a moderately warm iron with press cloth; do not use steam directly on the fabric.
Silk—For sheer fabric, use dry iron only; for heavier fabric, use light steam and press cloth.
Wool—Iron should not be placed directly on fabric; use steam and press cloth. A damp press cloth may be used to help shrink out ease in sleeve caps, curved seams, and hem edges.
Pressing Seams
Smooth each line of machine stitching by pressing along it before you press the seam allowance open or in the direction it should go. Press a seam open if you want the seamline to be inconspicuous on the right side. Press both seam allowances to one side when one is fuller than the other, usually pressing the fuller against the less full. For example, when you press the waistline seam of a gathered skirt, always press seam allowances up. If your fabric is likely to show the impressions of seams on the outside after it has been pressed, use a piece of paper between the seam allowance and garment. A pressing cushion, such as a seam roll, will also help prevent such impressions.
To save time, stitch a number of seams, then press them. Always be sure to press each seam before crossing it with another line of stitching. If it’s necessary to press over basting, press lightly. Leave the final pressing until the basting has been removed. Always avoid pressing over pins. Pin marks are very difficult to remove from fabrics, especially synthetics.
To keep fabric grainlines true, always press straight seams on flat surfaces and curved seams over a pressing cushion. Curved seams may need to be clipped or trimmed so they can be pressed flat and smooth. To flatten seams or creases, use a wooden beater to pound fabric immediately after it is pressed with a steam iron or a press cloth that is damp.
Finger pressing helps to open seam edges for pressing. Moisten the stitching line slightly with a damp sponge, cheesecloth, or small brush. Open the seam with your fingers and press as needed to flatten the seams. Finger pressing alone may be enough for some fabrics. If not, press the seam again using an iron.
Pressing Darts
Always press darts over curved pressing cushions. To aid in sewing, press the folded edge of a dart before stitching it. After stitching, trim very wide darts to a seam allowance width, then press the dart open over a pressing cushion. Fold the point of the dart toward the center of the garment.
Press narrow darts to one side. Lengthwise darts are pressed towards the center front or the center back of the garment. Bustline darts are pressed downward.
Pressing Pleats and Tucks
Press pleats or tucks in place before joining pleated sections to the rest of the garment. Place strips of paper under the edges if the fold of the pleat or tuck leaves an imprint on the right side of the garment when pressed. After stitching, press the line of stitching, then turn the pleat or tuck in the correct direction. Press folds flat on the right side using a press cloth.
Pressing Enclosed Seams
For other edges, such as the enclosed seam of a collar, cuff, or facing, press the seam allowances open before pressing them together. Grade and clip seams as needed and turn the garment to the right side. Press the area again to make certain that the edge is smooth and flat. Understitching will help keep seams from rolling to the right side of the garment.
Pressing Eased Areas
Steaming and pressing helps shrink out ease and shape fabric. The top of a sleeve cap can be eased by holding it over the proper pressing cushion while pressing. To shrink out fullness from the top of the skirt hem, lay it flat on a table or pressing board with a piece of cardboard under the section to be shrunk and press lightly with a steam iron.
Special Pressing Problems
• Corduroy, plushes, velveteen, and velvet should be steamed rather than pressed. If a steam iron is used, place the fabric right side up on the pressing board. Steam the fabric well, holding iron about 1/2 inch above the surface. After steaming, brush gently with a soft brush while the fabric is still damp. Let dry without handling.
• For pressing on the wrong side, place the fabric face down over a Turkish towel, a piece of self fabric, or a needle board and steam press lightly. Brush and let dry. Seams of these pile fabrics can be steamed and then finger pressed.
• Heavy crepes tend to shrink up when damp, and they are apt to flatten out and loose their crepey look when pressed. To press, place crepe fabrics right side down against a Turkish towel and press lightly using very little moisture or steam. Use this same method for pressing ribbed fabrics.
• Embroidered, embossed, and quilted fabrics should be pressed from the wrong side over a thick padding, such as a Turkish towel.
• Glazed chintz and other glossy fabrics are usually pressed on the right side to retain the shine.
• Puckered fabrics should not be flattened by pressing. They may need a light smoothing of the seams and touchup of the collar, cuffs, pockets, and other details.
• Dark cottons should be pressed on the wrong side to prevent shine.
• Gabardines and other hard-finished twills should be pressed lightly using little steam. Try finger pressing on seams and folded edges.
For Further Reading
C-205: Selecting a Pattern Size for Perfect Fit
https://pubs.nmsu.edu/_c/C205/
C-222: Sleeve Plackets and Bands
https://pubs.nmsu.edu/_c/C222/
C-227: Making Perfect Pants
https://pubs.nmsu.edu/_c/C227/
Original author: Susan Wright, Extension Clothing and Textiles Specialist. Subsequently revised by Constance Kratzer, Family Resource Management Specialist.

Jennah McKinley is a Family and Consumer Sciences Agent and I-CAN Supervisor for NMSU’s Cooperative Extension Service Office in Eddy County. She earned her B.S. in family and consumer sciences education and her M.Ed. in online teaching and learning from NMSU. She specializes in community education and 4-H youth development. Her programs focus on parenting, childcare, nutrition, diabetes education, family resource management, and youth development.
To find more resources for your business, home, or family, visit the College of Agricultural, Consumer and Environmental Sciences on the World Wide Web at pubs.nmsu.edu
Contents of publications may be freely reproduced for educational purposes. All other rights reserved. For permission to use
publications for other purposes, contact pubs@nmsu.edu or the authors listed on the publication.
New Mexico State University is an equal opportunity/affirmative action employer and educator. NMSU and the U.S. Department of Agriculture cooperating.
Revised October 2016


