Guide C-223
Susan Wright, Extension Consumer Education and Health Specialist
College of Agriculture, Consumer and Environmental Sciences New Mexico State University. (Print Friendly PDF)
Collars can add a fashionable finishing touch to a variety of garments, with collar style and shapes varying according to the season’s fashion emphasis. Collars may have a square or pointed corners or rounded edges; they may be cut in two pieces, in one piece, or as a part of the body of the garment. Some collars lay flat, some fold close to the neckline, and others stand up. Whatever the style, a collar should frame the wearer’s face, lying smoothly around the neckline, free of pulls, ripples, or wrinkles. The basic construction will be the same for all collars.
Making a Collar
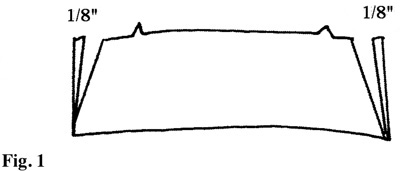
Cut the collar pieces according to the pattern guide sheet. To help undercollar stay “under”, trim the undercollar 1/8" in. smaller than the upper collar at the center edges near the neckline see fig. 1).
Be sure to mark the collar carefully at center back ( or front), shoulder line, and notches. Also, carefully mark the bodice neckline at center back, center front, notches and the point where the edges of the collar should be located. If the facing is part of the bodice, be sure to mark the foldline.
Apply interfacing to the upper collar. Most two-piece or folded collars should be interfaced. Fusible or sew-in interfacing of the appropriate weight should be applied to the upper collar. Applying interfacing to the upper collar will prevent the seam allowance from showing through on the right side of the finished collar.
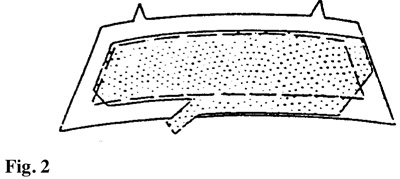
Sew-in interfacing be sewn in place when the collar is staystitched. After staystitching the interfacing, trim the interfacing close to the stitching. Trim the interfacing out of corners to reduce bulk (fig. 2).
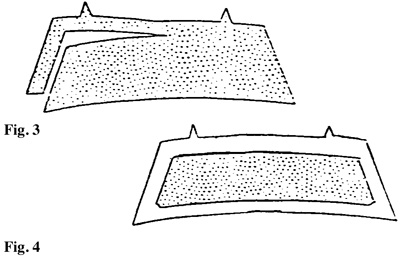
Fusible interfacing should be applied before the collar is staystitched. Before applying, trim the fusible interfacing to 1/8" seam allowance (fig. 3). Trim the interfacing out of corners to reduce bulk (fig. 4).
Pin right side of upper collar to right side of the under collar matching all cut edges.
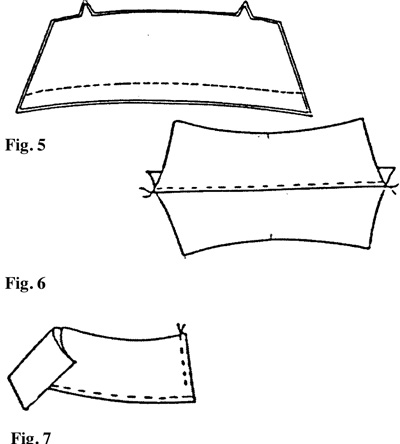
For a pointed collar, sew the outer edge (fig. 5) then grade and understitch the seam (fig. 6). Fold ends, matching cut edges, sew. Understitch as much of the seam as possible (fig. 7).
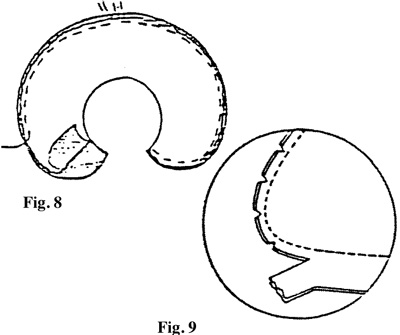
For a rounded collar, sew outer edge from center to neckline edge (fig. 8). This will prevent distorting the collar’s shape. Grade the seam and notch the rounded collar where necessary (fig. 9). Understitch as much of seam as possible.
Press collar carefully so the undercollar is flat and does not roll to the right side.
Attaching the Collar
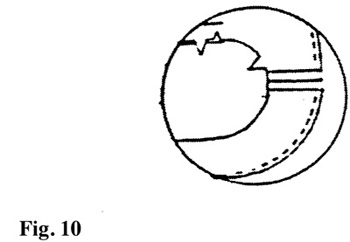
- Staystitch the neckline edges of the bodice and facing. Sew the facing shoulder seams together. Trim the shoulder seams of facing to 1/4" to reduce bulk (fig. 10).
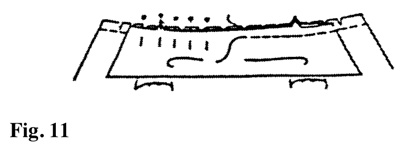
- Pin, the cut edges of the collar to neckline edge, matching center back, notches, shoulder line, and points where collar should end. Clip the neckline edges as needed to fit (fig. 11).
- Stitch collar to neckline on 5/8" seam.
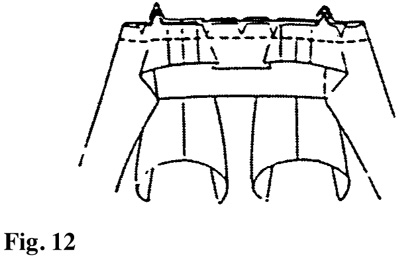
- Fold the facing over collar and pin matching notches and other markings. Clip the seam where necessary. Sew facing in place (fig. 12).
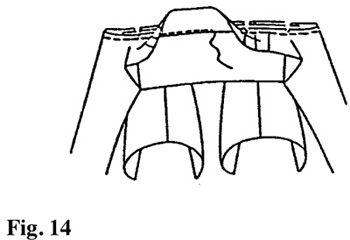
- Grade, clip and understitch seam where necessary (figs. 13 and 14).

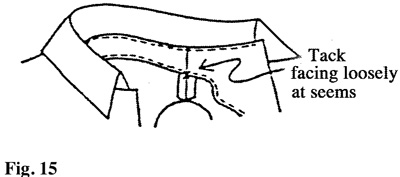
- Press facing in place. Secure the facing at shoulder seams by hand-tacking or stitching-in-the-ditch (fig. 15).
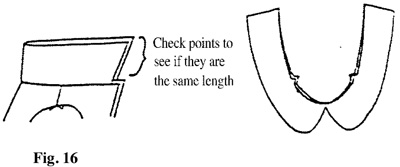
- Check the points or curves of the collar to make sure they are the same (fig. 16).
Variations of Collar Applications
Edgestitched Collar
- Trim upper seam allowance at neckline to 1/4". Press the seam allowance to wrong side along seamline.
- Sew the undercollar to upper collar along outside edge. Grade and understitch the seam.
- Sew the ends of the collar matching folded edges to 5/8" seamline of collar neckline. Grade the seams; understitch as much of the seam as possible.
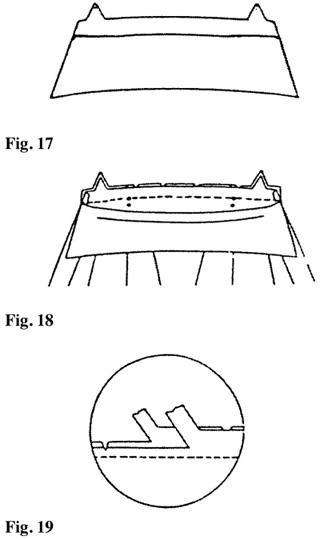
- Turn collar right side out, press (fig. 17). Pin the undercollar seam to neckline edge matching notches, shoulder line and other markings (fig. 18). Stitch the seam carefully. Grade the seam (fig. 19).
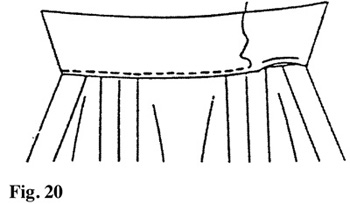
- Pin the folded edge of the upper collar neckline over the neckline seam allowance. Edgestitch through all thickness (fig. 20).
Quick Collar Finish (Partial Facing)
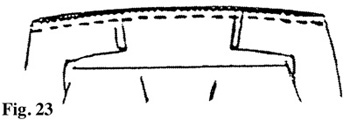
- After finishing the collar, attach it to the neckline by matching the neckline edges and notches of collar to neckline edges and notches of the garment. Sew in place through all thicknesses (Fig. 21).

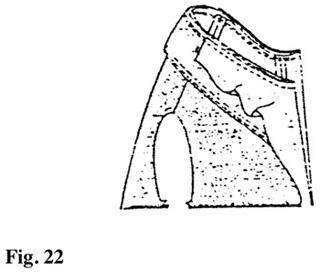
- Fold partial facing over collar, matching notches and other markings. Sew in place (fig. 22).
- Grade seam of the faced area only. Zig-zag stitch or serge the remaining neckline seam, close to the seamline. Trim close to zig zagging.
- Turn the facing right side out and press carefully. Pin facing ends in place at shoulder seams and secure by stitching-in-the-ditch (fig. 23).
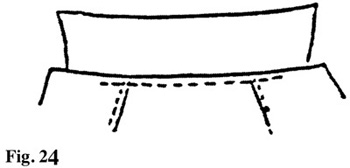
- From the right side of the garment, understitch the neckline/collar seam allowance from 1" beyond one shoulder to 1" beyond the other shoulder (fig. 24).
To find more resources for your business, home, or family, visit the College of Agricultural, Consumer and Environmental Sciences on the World Wide Web at pubs.nmsu.edu.
Contents of publications may be freely reproduced for educational purposes. All other rights reserved. For permission to use publications for other purposes, contact pubs@nmsu.edu or the authors listed on the publication.
New Mexico State University is an equal opportunity/affirmative action employer and educator. NMSU and the U.S. Department of Agriculture cooperating.
June 2001, Las Cruces, NM.