Sewing Sleeves
Guide C-211
Reviewed by Wendy Hamilton
College of Agricultural, Consumer and Environmental Sciences, New Mexico State University
Author: Professor and CES Grants and Contracts Development Specialist, Media Productions Department, New Mexico State University (Print friendly PDF)
Popular sleeve styles vary with fashion, from set-in to raglan to kimono to dolman. But whatever the style, there are some guidelines that will help you determine how the sleeve should look.
The most popular style is the plain set-in sleeve. It fits into the bodice with no apparent fullness, even though the sleeve is always larger than the armhole.
A shirt-style sleeve is an important set-in sleeve style. It features a short sleeve cap and is usually the same size as the armhole it fits. It also fits into the armhole smoothly.
A kimono sleeve is cut as part of the bodice. Its slope and width influence the fit and the ease of movement when worn. A gusset may be used to reduce strain on the underarm seam.
A raglan sleeve is sewn to the garment with seams that run from the neckline to the underarm. The seams may be a simple diagonal or form a special design effect. A raglan sleeve is easy to sew and comfortable to wear.
Plain Set-In Sleeve
A plain set-in sleeve must be eased and shaped to fit the armhole. When finished, it should fit smoothly over the end of the shoulder with no indication of gathers along the seamline. When worn crosswise, the grainline should be parallel to the floor and the lengthwise grainline perpendicular to the floor.
To achieve this finish in a set-in sleeve, the sleeve cap requires easing where the sleeve is most nearly true bias—above the notches. To ease this area, a line of ease stitching is sewn on the 5/8 inch seamline (1.5 cm) while the sleeve is flat. A second row of stitching can be sewn just outside the first row, on 4/8 inch (1 cm), if desired. Each line of stitching is a row of stitches that are longer than regular stitches; they are sometimes referred to as gathering stitches. The ease stitching is used to shape the sleeve cap to fit smoothly into the armhole.
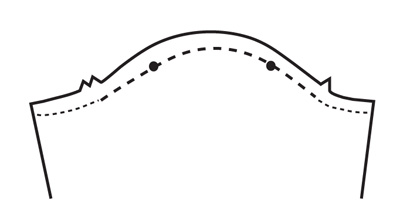
To ease the fullness, pull the bobbin thread(s) until the sleeve cap fits the armhole. Distribute the fullness, evenly matching the notches and dots of the sleeve to those of the armhole. There should not be any easing in the top 1 inch (2.5 cm) of the sleeve cap.
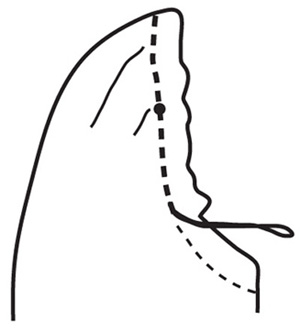
After the sleeve is eased to fit the armhole, press the seam allowance of the sleeve cap to shrink out excess fullness. Pin the sleeve into the armhole, matching notches, dots, and seam edges and stitch into place following these steps.
1. Pin sleeve into armscye matching notches, dots, and seam edges. Adjust east to fit bodice armhole, as needed.
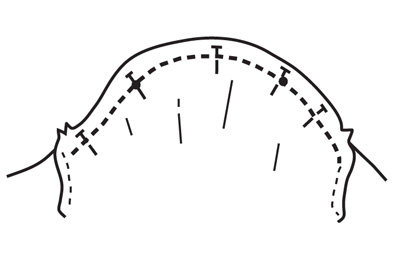
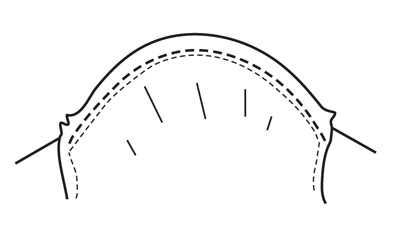
3. Sew underarm seam of sleeve and side of bodice. Press.
4. Pin sleeve underarm to bodice armhole. Be sure the side and sleeve seams match.
5. Sew sleeve underarm seam on 5/8 inch (1.5 cm) from notch to notch, overlapping the stitching about 1 inch (2.5 cm) at notches.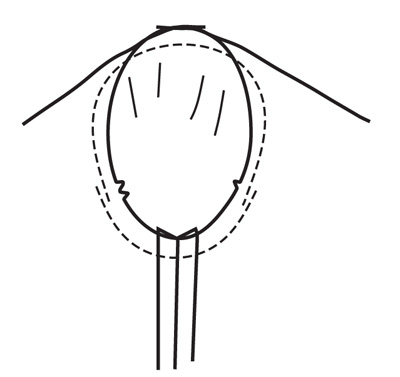
6. Trim the underarm seam allowance from notch to notch to reduce bulkiness. Stitch again on 4/8 inch (1 cm). Do not clip seam allowance.
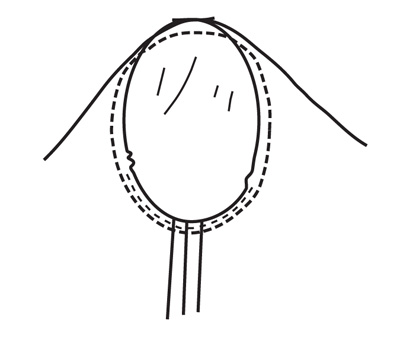
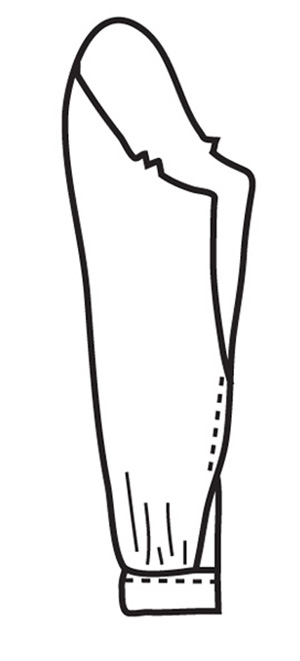
NOTE: If the sleeve is long and has a cuff, you may want to sew the bottom half of the seam and attach the cuff before setting the sleeve into the armhole.
Shirt-Style Sleeve
Shirt-style sleeves are not as tailored in appearance as the plain set-in sleeve. This sleeve style is often sewn using a flat felled seam. The seamline should fit smoothly over the end of the shoulder with no indication of gathers along the seamline. It fits more loosely under the arm than a plain set-in sleeve.
Because of the short cap of a shirt-style sleeve, the crosswise grainline of the sleeve will not be parallel to the floor. The lengthwise grainline should, however, be perpendicular to the floor.
Follow these steps to set in a shirt-style sleeve.1. Stitch sleeve length on 5/8 inch (1.5 cm) seamline from underarm to notch with regular stitching. Change stitch length to ease stitch at notch and stitch around cap to the double notches. Change stitch length back to regular length at notches and stitch to underarm seam.
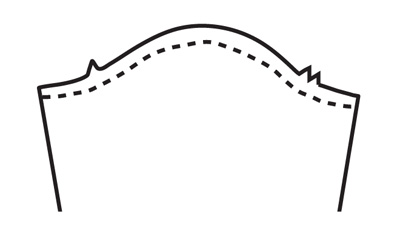
2. Pin sleeve into armscye of shirt, matching notches and seam edges. Adjust ease to fit shirt, if necessary.
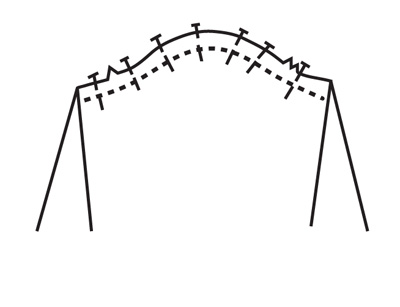
3. Stitch sleeve to shirt by stitching on the line of ease stitching around the sleeve cap.
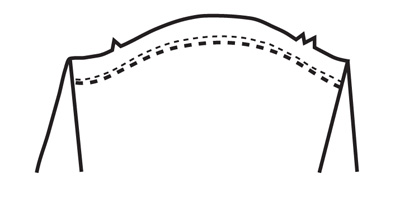
4. Fold sleeve and shirt with right sides together and stitch seam of sleeve and side seam of shirt. Double stitch at underarm, if desired.
Kimono-Style Sleeve
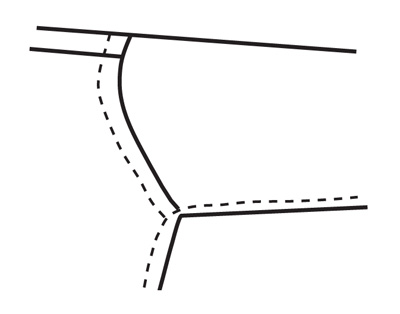
Because a kimono sleeve has been cut with the bodice, the fit is very different from that of a set-in sleeve. The shape and width of the sleeve will determine its comfort. If the sleeve is narrow and slopes close to the body, a gusset (diamond-shaped fabric insert) may be used to reduce garment strain and allow freedom of movement. If the sleeve is cut at a right angle to the side seam, it provides enough ease for lifting and reaching. Although a gusset is not needed, the underarm seam should be reinforced using one of the following methods.
1. Stitch shoulder seam and press.2. Stitch underarm seam.
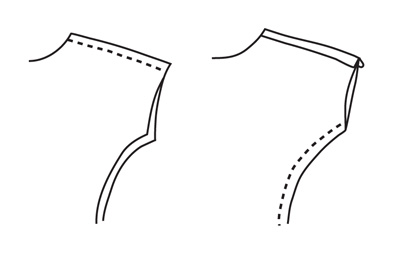
3. Center a 3-inch (7.5 cm) length of woven seam tape or twill tape on the curve of the underarm seam. Stitch tape to underarm on the original seamline.
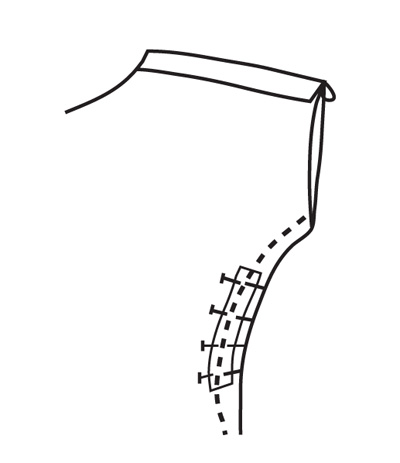
Or clip the underarm seam and press open. Center the tape over the seam allowances on the wrong side and pin in place. Machine stitch on the right side of the garment 1/8 inch (0.4 cm) on each side of the seamline.
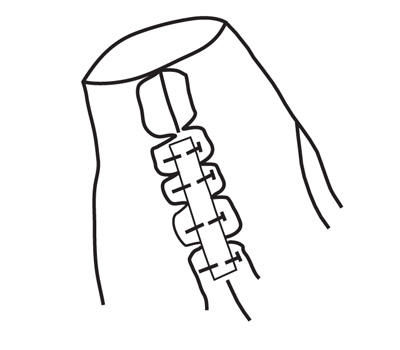
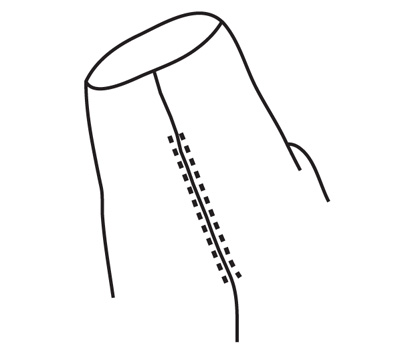
4. Trim seam allowances in reinforced area to half their original width. Press seam allowance open above and below tape.
Raglan Sleeves
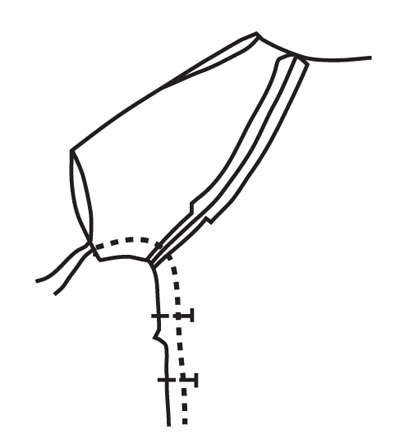
Raglan sleeves can be one- or two-piece sleeves. One-piece raglan sleeves have a dart for fitting at the shoulder. Two-piece raglan sleeves are seamed the length of the sleeve with shaping to fit the shoulder. Peasant-style sleeves are raglan sleeves that use elastic or a drawstring to fit the sleeve over the shoulder. In each sleeve style, the sleeve forms part of the garment neckline.
1. Sew shoulder dart, trim to 5/8 inch (1.5 cm), and press open. If seam is used, sew seam and press open.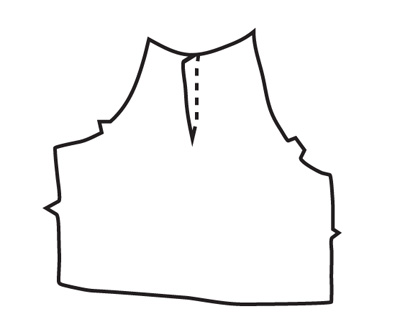
2. Pin sleeve to bodice of garment right sides together matching notches, dots, and seam edges.
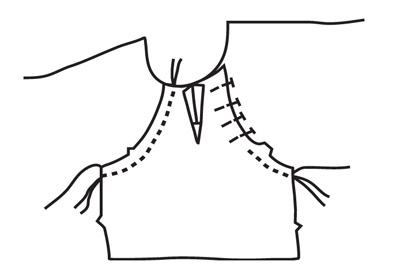
3. Sew seams and trim to 3/8 inch (1 cm) from the notches to underarm. Press seams open.
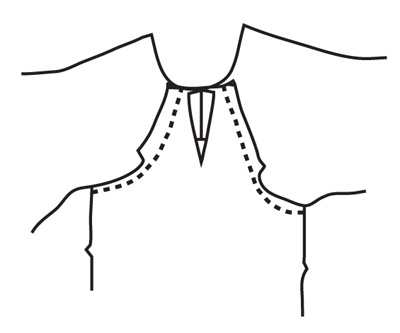
4. Match the sleeve seams at the underarm and stitch side seam of the garment and the sleeve. Press seam open.
Original author: Susan Wright, Extension Clothing and Textiles Specialist.

Wendy Hamilton is an Extension Evaluation and Accountability Specialist at New Mexico State University who provides expertise for program development and evaluation. She has worked at four land-grant universities, and has a diverse background in textiles and clothing, adult education, 4-H youth-at-risk, horticulture, evaluation, and grant writing.
To find more resources for your business, home, or family, visit the College of Agricultural, Consumer and Environmental Sciences on the World Wide Web at pubs.nmsu.edu
Contents of publications may be freely reproduced for educational purposes. All other rights reserved. For permission to use publications for other purposes, contact pubs@nmsu.edu or the authors listed on the publication.
New Mexico State University is an equal opportunity/affirmative action employer and educator. NMSU and the U.S. Department of Agriculture cooperating.
Revised March 2015


